-
Always happy to help. And yes, Adobe's trying to nail down some of the things that El Capitan don't like ... but no idea when that "fix" will be out. Or another Apple patch for E-C.
Neil
-
@rNeil thank you for detail answer. I asked because I will be in the position to finish important projects next week So was thinking to start everything fresh but it looks like i will do one step forward to cc2015 on stable 10.9.5
Probably Adobe will make same update for Capitan soon as well.
Thanks again
-
From the things I'm still seeing on the Adobe boards & elsewhere, I wouldn't go to El Capitan quite yet. A number of the worst things have been fixed in the latest patch for that OS, but still ... many people are having cursor-lag issues & such.
I'd give Apple another month or so on this one.
And as to the PrPro2015 ... there are some nice new things in this, but for some the Direct Link to SpeedGrade is problematical to plain unusable (though some seem to be fine). Some are having issues going into AE, others not. Best practice is as always, install 2015 and keep the previous versions installed.
The stupid installer some upper brain at Adobe insisted on over the advice of the PrPro team (noted publicly on the forum) automatically uninstalls any previous version ... UNLESS ... you dig through the install options to find the one to leave previous versions alone. Why did this change this time? Because some upper ... um ... whatever ... thought that they should have "uniformity" of installer actions across their programs so people don't get confused. And this is the way several other programs have typically installed, so the PrPro installer HAD to be set up to default to removal of previous versions ... which is 180 degrees AGAINST the proper procedure publicly listed for PrPro use on the Adobe PrPro blogs & all information.
As ... any project created in one version should probably be run to completion in that version, as most of the time but NOT always do projects update properly because of changes in how tools & effects work.
For continuing projects, start a new instance of that project in the new version (while still working it in the old) ... copy assets to new folders for this project and bring them in testing how it all works ... and when you've got it working fine, take off "officially" in the newer build.
I have some projects still in 2014.2, some in 2015. A few new projects that would need heavy grading I've started in 2014.2 because I'm one for whom the PrPro/Sg Direct Link works better there than in 2015.
2015's "cool new" Color workspace with a Lumetri panel fresh-designed is quite useful for many who just need some quick modification of the look/feel of the image and don't need a full-blown grade. They've also updated some of the audio processes to work better.
Neil
-
Im still on 10.9.5 with CC 2014 Thinking of clean install CC2015 on 10.11
Can you please confirm if el Capitan is ready for Ppro and Ae 2015 (and opposite:) or its better to wait a little longer?
-
I need to EDIT my previous remarks ... sorry!
The way Lut Buddy works in PrPro 2015 I can't actually add a LUT ... so screw that! In the "last" step where you are adding a film/style type LUT, you need to apply another Lumetri effect placed below the color correction steps in the Effects panel, and use the "Creative" twirl down triangle to get to the "Look" LUT option.
So ...
1) add a Three-Way color corrector effect; 2) next, put your input/tech/log-correcting LUT in the Lumetri panel "Input" LUT on the Basic tab; 3) adjust the "top" Three-Way to get best color balance & exposure/gamma/gain "through" that LUT; 4) apply another Lumetri effect to the Effects panel, in the Creative tab put your output/films-style LUT; 5) go back to the first Lumetri effect/panel and do your looks-adjusting grading.
Or just Direct Link over to Sg ... 1) make a LUT layer as the second layer up in the lower right panel (click the + icon at bottom, then "Film-LUT" options) 2) use the bottom 'base' Primary layer to adjust WB/offset/gamma/gain to get your image technically controlled; 3) add another primary layer above the tech LUT; 4) add another LUT layer above 3) for your output/film-style LUT; 5) go to the primary in 3) and do your grading, adding secondaries or other primaries along with this one sandwiched between the two LUT layers as needed.
Similar steps but I'm much faster at this in Sg ...
In Resolve, make three nodes ... input LUT on first one, grading on second, output on third ... add nodes as needed. Similar workflow.
Neil
-
PrPro's Lumetri panel information ...
I got a detailed clarification from querying the PrPro/SpeedGrade "team" on the order of application of effects in the Lumetri panel Color Workspace in CC2015. And ... yes, the Lumetri panel is completely Rec709.
As it shows in the panel, so it is ... total top-to-bottom in application.
Basic panel effects are applied first ... and that's why the Input (technical/log-correction) LUT is at the top ... so it can "bring" non-Rec709 media into Rec709 for the panel to work properly with it.
AFTER the input LUT is applied, then the order of application of effect is straight down the panel ... and in fact, down through the panels ... so in the Creative panel, if you apply a style or "look" LUT there, anything you do in that panel or panels below messes with the curves or colors of your chosen stylist LUT. And on down ... until the last thing applied is the Vignette panel.
This is ok for a lot of basic or non-critical stuff. But ... if you're really working your tech & style LUTs this is NOT the way you'll probably want them applied. In that case ...
1) Apply a Fast or Three-Way color correction effect to your clip first ... 2) put your log-correcting or whatever "tech" LUT into the Basic tab of the Lumetri panel ... 3) go back to the Fast or Three way corrector you first created, and do your WB/L/G/G exposure/contrast corrections to "feed" the best signal to your tech LUT in that Basic tab 4) go through the Lumetri tabs applying things as you see fit mostly then 5) go back to the Effects tab, and apply your film/style LUT (maybe using LUT buddy) on the effects tab BELOW the Lumetri panel stuff, and 6) go back to the say Basic & Creative tabs to adjust the work there so the best final result shows up through your film/print LUT you put on with LUT Buddy in step 5.
Of course, if Direct Link to SpeedGrade is working fine for you (as it does for many though not all in CC2015), you can just D-L over to Sg.
Neil
-
Thanks for the link. Excellent and short tut on this especially considering this is in Ae .
-
End credits using Adobe After Effects
-
You're probably good to go using the native mov files, though some have reported better playback using ProRes & DNxHD, as apparently they might be less compressed (though larger) than the mov files, and playback for editing smoother as there's less CPU work to decode.
Most of the time, I don't need to render previews. So I've not spent a lot of time with that setting, and realistically, it's not that useful for a lot of export purposes so I've not a ton of knowledge. Personally, I think people worry too much about that. And no, PrPro won't make p-view files unless you tell it to, or say for Warp Stabilization it HAS to. The rest of the work it does is by reading the original file on disc, applying your settings to that and giving the result to the computer to display on the monitor.
Doing a lot of time altering effects, heavy color grading, multiple layers on the timeline, those things can make using a preview file a good thing. At that point, take one of the choices and see if it improves playback time and is usable while viewing. Choosing something good enough to use in an export will take a bit more space on disc ... and yet may not save that much of the export time as a total percentage of the time to make the new file.
Neil
-
I'm confused with the video preview setting in the sequence settings...
I've read that if no effects or frame rate conversions are applied,then codec/resolution of original clip will be used..
Assuming that i'll use an effect,what's the setting i must choose (gh4 4k .mov files probably in 4k timeline)?
Are these preview files used when i choose to render a part of the sequence or even if i don't render?
How does it affect the overall ppro performance?
PS still trying to decide if i should transcode gh4 files to prores prior to importing into PPro...
-
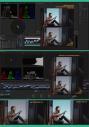
@soulkeeper, the first picture to the left in the post above mine.
-
@soulkeeper look at rNeil's first picture (to the left) for reference.
Furthermore: In a video I just posted we had a lot of lighting issues. It was raining on and off all day, and on some days it was bright and sunny. Other days the light was not coming into the room at all. I adjusted the temperature in lumetri along with some other adjustments individually to get the clips to match and had some great results without being in there for hours matching wavelengths and checking levels for every adjustment. The saturation controls though just bled everywhere, not my favorite.
If I need more color I'll adjust the saturation with something like RedGiant or just use AE's standard controls. Then I'll use RedGiant's cosmo to target the skin specifically and adjust to where I want it to be, within reason.
-
In the various tabs ... as displayed in the images, you've sliders, curves control, & wheels with the vertical sliders for luminance next to them ... all in PrPro CC2015's Color workspace.
Neil
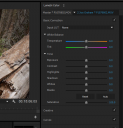 LumBase.PNG533 x 553 - 171K
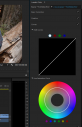 LumCurve.PNG542 x 841 - 318K
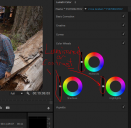 LumWheels.PNG598 x 583 - 287K
 -
you mention tonality controls...which specific tools in Lumetri are you referring to?
Thanks!
-
Yea ... parts of the movement of Lumetri panel controls into PrPro are great. And right now the Direct-Link to Sg is working ok for me. Was slowish & occasionally just glitchy a while back. I still find it's so fast for me to work in Sg that I prefer that to the PrPro-Lumetri panel for most work.
But if it's a quick dash-off, the WB & exposure, sat, & contrast are pretty decent in-cam ... a few moments in that Lumetri "workspace" and it's outta here ... that's nice.
Neil
-
@rNeil I have found the same issues. The saturation and hue controls don't seem very "tight" they tend to just flood the entire image with color that doesn't quite match up with other scripts that you can adjust saturation with. With gh2 footage I can't ever seem to get these controls to fit quite right. HOWEVER the tonality controls in Lumetri are fantastic, and the temperature controls fair very well. I tend to use Lumetri to get my base and then use RedGiant or AE's Color Finesse to fine tune my colors. I still LOVE LOVE LOVE that I can have my wavelengths and effects and adjustments (stable) on the same page/workspace.
-
Ahh ... Dave Dugdale found a blurble in the Premiere Pro CC2015.2 color workspace ... the sat controls. Increasing sat using the controls on that right-side color-control panel caused the color to "bend" towards the "left" around the color wheel. Skin tones that lined up right in a narrow spike on the i-line that people often call the "skin-tone" line became very diffused and shifted quite a ways to yellow as you push more sat into the image.
I tested and confirmed ... Dave also says the hue controls gave him some trouble, I've not tested that yet.
However ... the 3-way & fast color corrector sat controls worked as expected. And bug reports are filed.
Just an fyi ...
Neil
-
Except ... be careful in the Mac world ... quite a few intriguing problems with El Capitan ... sigh. And for PC's, Win10 is working for more folks, still problematic for others.
Neil
-
Again, some update details
For Video, Adobe ushers in a new era of UltraHD via comprehensive native format support for editing beautiful 4K-to-8k footage; and advances color, with support for High Dynamic Range (HDR) workflows in Premiere Pro CC and improved color fidelity and adjustments in After Effects CC. Remix, a powerful new audio feature is added to Audition CC. New Touch capabilities are introduced, with Premiere Pro CC, After Effects CC and Character Animator optimized for Surface Pro, Windows tablets or Apple track pad devices.
-
Whatup mafiadi casa di banhu =)
Yet another bug, Premiere - AME (adobe media encoder) related; and its simple workaround.
If like in this post above you're bringing your own LUTs or an external set to Premiere's Lumetri panel, beware that those same LUT's have to live inside AME's lumetri folder too, otherwise any export through AME will be off, they have to be clone folders (so to speak). Probably the same happens to SpeedGraVe as the ref final image is already showing this.

My personal view of new lumetri space is unchanged, it looks good on paper but it's very resources hungry, a minimally complex look turns system into a zombie horny for brains to a point of having to chop several heads. For some small and precise finishing touches it works, not so for any serious grading process. This voodoo mojo seems to escalate when using other LUTs than the supplied by default.
I still have to encounter (other than 3dlut creator) a platform that empowers user with a simple shortcut (previous - next) to preview all LUTs of a given set/list.
Stills from (remerci) Nick Driftwood's Gh4 showGun run viloGO noseque+
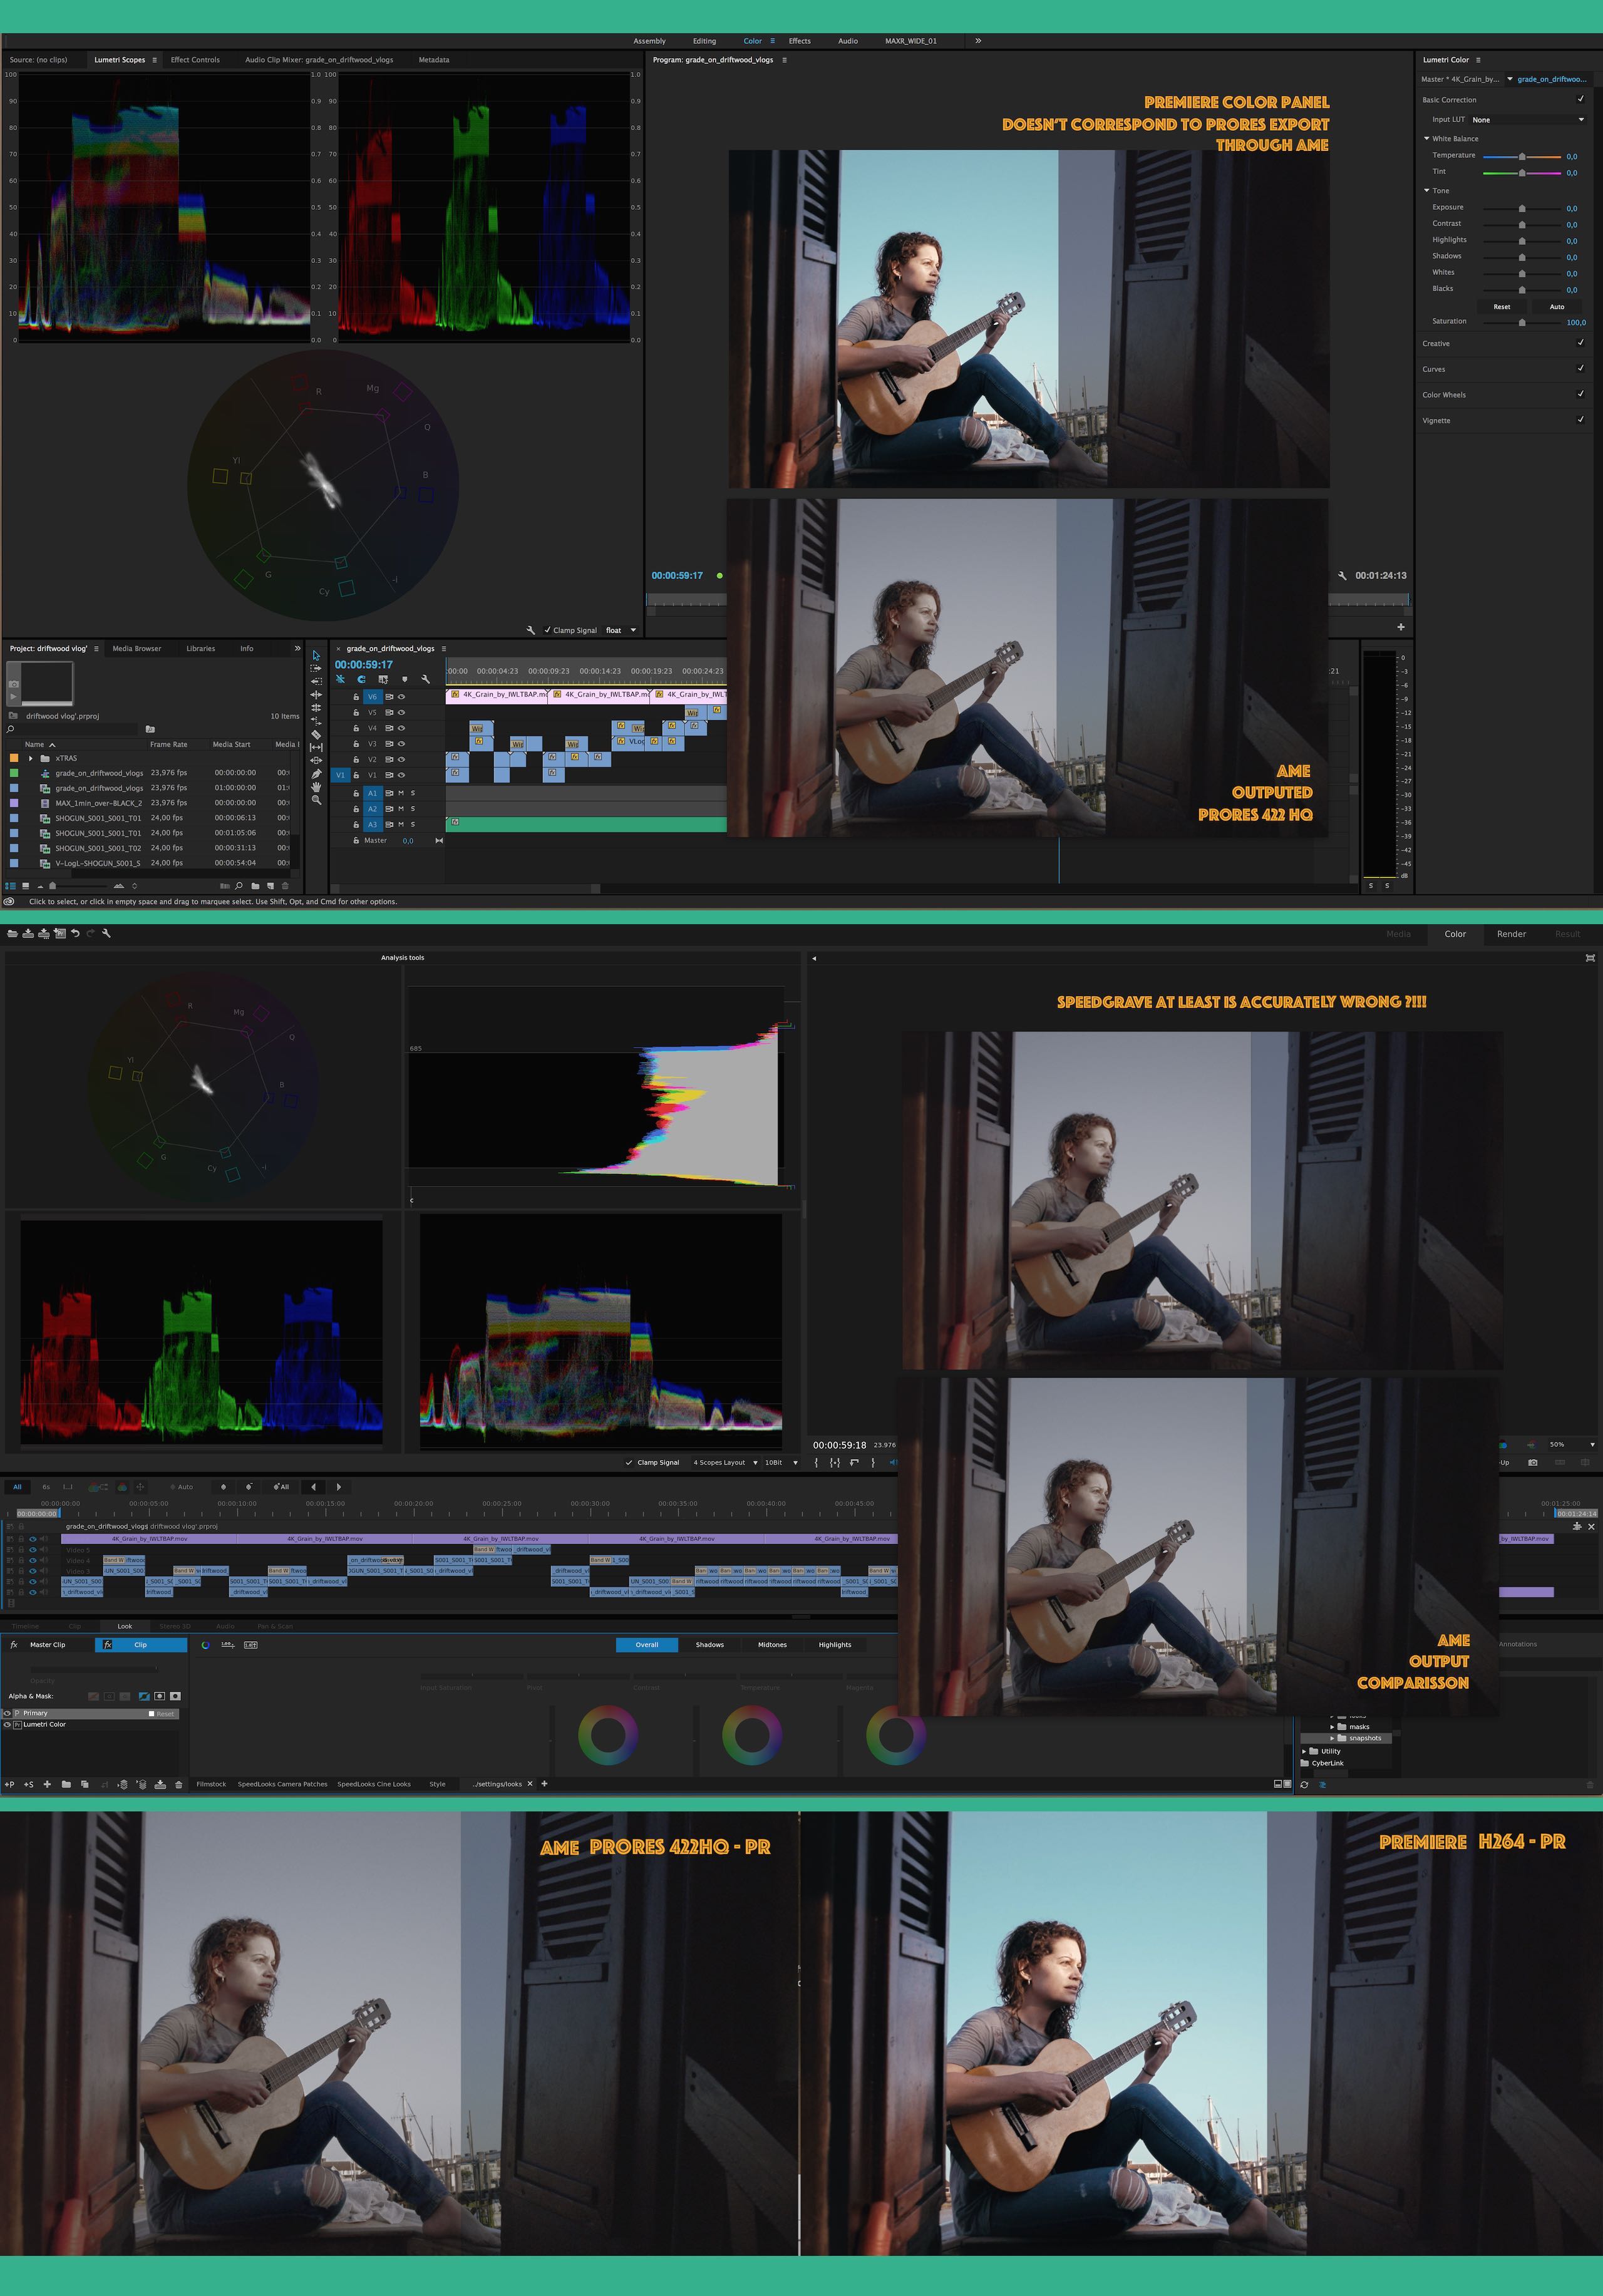
 PR-AME_LUT-prob copy.jpg2560 x 3667 - 693K
 -
Tilt shift effect
-
Loading LUTs
-
Broadcast Finishing Techniques for Premiere Pro
-
I've not heard a complaint about this particular issue before ... I've heard a lot of complaints about the difficulty in figuring out what the choices in migrating/cleaning projects through Project Manager actually DO ... which is a total pain. If you're not sure what something does exactly, how do you make an intelligent choice?
The most common comment from working folks I know is they organize their folder/project-bit placements themselves, and use Project manager for a few things, but their own practices for most stuff involving archiving/migrating projects. Big pain, really ... and yea, it would be quite useful if this was a clearer, simpler process.
Neil
-
@rNeil maybe so, but this is not a choice, it is A BUG... like many others adobe very very very slowly irons out... hey but wait, if nobody complains it's it's not there. Anyway dear costumers here's an exciting revamped, re-vitalized new interface on what to drool over, quad extra cheese on top of all brand new bugs and still some old ones for those of you who gained affection. Give me a brake!!!


Howdy, Stranger!
It looks like you're new here. If you want to get involved, click one of these buttons!
Categories
- Topics List23,985
- Blog5,725
- General and News1,354
- Hacks and Patches1,153
- ↳ Top Settings33
- ↳ Beginners255
- ↳ Archives402
- ↳ Hacks News and Development56
- Cameras2,362
- ↳ Panasonic991
- ↳ Canon118
- ↳ Sony156
- ↳ Nikon96
- ↳ Pentax and Samsung70
- ↳ Olympus and Fujifilm100
- ↳ Compacts and Camcorders300
- ↳ Smartphones for video97
- ↳ Pro Video Cameras191
- ↳ BlackMagic and other raw cameras116
- Skill1,961
- ↳ Business and distribution66
- ↳ Preparation, scripts and legal38
- ↳ Art149
- ↳ Import, Convert, Exporting291
- ↳ Editors191
- ↳ Effects and stunts115
- ↳ Color grading197
- ↳ Sound and Music280
- ↳ Lighting96
- ↳ Software and storage tips267
- Gear5,416
- ↳ Filters, Adapters, Matte boxes344
- ↳ Lenses1,579
- ↳ Follow focus and gears93
- ↳ Sound498
- ↳ Lighting gear314
- ↳ Camera movement230
- ↳ Gimbals and copters302
- ↳ Rigs and related stuff273
- ↳ Power solutions83
- ↳ Monitors and viewfinders340
- ↳ Tripods and fluid heads139
- ↳ Storage286
- ↳ Computers and studio gear560
- ↳ VR and 3D248
- Showcase1,859
- Marketplace2,834
- Offtopic1,321
Tags in Topic
- adobe 55


