It allows to keep PV going, with more focus towards AI, but keeping be one of the few truly independent places.
-
Hello guys and girls. At first just want to say that if someone feels that this is self advertising feel free to delete this thread or move it where it is appropriate. After some thoughtful moments I decided that it is interesting for you to see, as it was my research in making the digital video look as more as film as possible and i wanted to share what i came up with.
Since the introduction of Digital Cameras it became easy to film and to learn making indie films, you just grab your camera and experiment with it. However the look of the digital footage(even color corrected and graded) still leaves amateur and domestic camera impression, the digital footage doesn't look as good as straight out of the film camera.
What is it about film that people like so much? Simple - it's color. Maybe some will say dynamic range, some will say the motion and flares. But the best feel about the film is that it looks unique and cinematic. People say that film has a unique color processing that can never be achieved by a digital camera. I take a more scientific approach and after many researches I found some breaking points in simple After Effects effects profiles and LUT usabilities and achieved unique fake color caps which gives that beloved film feel. The limited color brightness is one of the most important things when trying to emulate film look.
The hardest part in grading Digital footage is that it needs to be RAW or LOG, that means a flat footage taken out of expensive cameras. Then it is graded digitally by shifting colors of keyed parts, adding tints and editing curves. Amateur and Indie filmmakers sometimes doesn't have all those REDs and Black Magics and ARRIs and other beautifully named machines and anyway they want to look pro, so what we all indie filmmakers do is not called grading we just do the color correction - just create some interesting looks by shifting and tinting video. But there is certain points and colors that will leave that digital and domestic feel in the DSLR video even when it is color corrected. The colors overbright, and oversaturated areas doesn't change with color correction. Many of indie filmmakers lowers the saturation, but what happens is that they desaturate all areas of the footage so colors in shadows becomes undersaturated. I tried to fix it by collecting some unique braking points of Adobe After Effects CS6 as known as ColorGhear techniques but instead of doing it manually I tried to automate the process. The process is not grading nor color correction - it's something very different and unique and is used as a simple preset for After Effects CS6, which will be available soon for just a few dollars ($5-$10).
So I made some tests. At first I didn’t even think that I would come up with something interesting but now I actually need your opinion, it is usable? Does it really make a difference and most important – does it make the footage look like FILM (kodak). It does certain things to a simple footage: adds color bright limit, adds saturation limit ONLY to oversaturated areas, increases saturation to undersaturated areas, makes overbright colors(not whites) more visible and appealing on screen (for human eye).
There was a guy who tried to create and then disappeared his plug-in known as "Filmvision plug-in" I think he used similar techniques.
What do you think ?
Also I will make a video with just original color limiting process because the current video also affects the overall saturation and makes it more blockbuster Blue Orange type of thing.
-
Le Havre definitely has that 70's look to it, both in texture/image type but also in choice of shot composition.
While being shot on the same Vision3 stock as all of this year's non-Fuji film-origination. Astounding.
-
@goanna Agreed that Upstream Color has nice look to it. I think these days, audiences are getting used to a variety of looks/textures/image types etc. It's all about whether "it works" for the film...or better put..."how it works" for the film. Not sure what hack setting, camera settings, and lenses Upstream Color guys used, but it's nice.
@maxr Le Havre definitely has that 70's look to it, both in texture/image type but also in choice of shot composition.
-
There's a saying "each crazy with his theme" :P
3 more examples of recent films which happen in the 70's context and 3 different grading courses
Hunger, 2008. 1st of McQueen's films. Context: inprisoned IRA activists fighting for their rights.
This movie also features one unforgettable long dialog scene with phenomenal acting
Balada Triste de Trompeta, 2010. Very strange/macabre film by Alex de la Iglesia with great intro titles.
Context: Spain somewhere at beginning of the 70's • clowns are a BIG metaphor :o)
Le Havre, 2011. Though the film is supposed to happen nowadays I think Aki Kaurismäki is still living in the 70's
There is a care and (false) simplicity in the scenography only rivalled by the colour palette, just beautiful
This one though beautifully graded (with no hope), it's a bit out of - era - context
-
@rNeil if you're matching the look of a low quality telecine from one of those late-60s/early-70s films perhaps. Otherwise it sounds like something for maybe the next installment of Grindhouse.
A good quality DVD or BD transfer of these films does not look the same as seeing a projected print of the same film in a theater and it may use negative material, resulting in a different aesthetic than what you might remember from seeing the film in theaters. Similarly, you're not getting the same experience from a DVD or BD release of David Fincher's Seven as you might have in one of the select theaters to get an ECC release print.
So that begs the question, when doing film emulation on digital footage with the target being one of these old films, are you trying to emulate what that film would look like after a high quality telecine, as viewed on your digital video display, or are you trying to emulate the look of that film as projected in the theater, while still viewing on your digital display?
The former makes more sense than the later, which would actually need a third LUT, the one that emulates how much of the light passed through the print hitting the screen would be reflected into your eye at some pre-defined distance from screen. Because, yes, you don't just look at negative, you look at print, but you don't just hold the print up to your eye and you don't watch the film through a loupe over a light table. So this can get rather silly.
Realistically speaking, 99% of potential users for film emulation are using as their benchmark the look of film origination as it appears on their video displays, be that their computer or television set, watching stream, digital disc or broadcast. Some material viewed this way might necessitate a two-LUT, dual film emulation. The ideal as expressed by deluxe, archival, special edition or restored releases of films distributed in the digital realm will not always have a print component and therefore require a one-LUT single film emulation strategy.
Oh, and:
But then, that's not what I was referring to, nor what Shian up above referenced either, is it?
He was responding, emphatically, to a posted article referencing a professional colorist's approach to film emulation that's similar to both his and that of Film Convert. In the body text of the article as well as the caption to every single image depicting film emulation he mentions two LUTs being used, one for negative and one for print. So, yes, it would be reasonable to assume this is what both you and he were referring to as "the way" and the missing piece of film emulation as a general practice.
-
If you are talking only about a "current" practices/tools workflow for those choosing to shoot film and deliver digital, then yes ... there isn't a print-stock part of the process. But then, that's not what I was referring to, nor what Shian up above referenced either, is it?
What that part of the discussion was about is the notion of matching the total look of a say, late-60's/early-70's film as released ... which most definitely DID include both a film-stock used in the camera, AND the print-stock used for release.
Which is why the comments about someone trying to "match" the look of the film-stock only and thinking that they were then going to be able to match what the released-to-theatre PRINT looked like.
Neil
-
Very cool.
-
@cyzercraft if you feel this is not pertinent to the "discussion" I'll take it out with no sweat ,-)
Original footage
Recreation from Balibo film
Trailer from Balibo film
SPOILERS
In this movie, other than a very nice OST - though at the end of the film can't really enjoy Lisa Gerard's epicness stuff while indonesian sons of bitches are shooting in cold blood ordinary timorese citizens - and superb camera work (double challenge as they nail 70's medium and close up handheld shot style too), there are very interesting grading decisions. I.e. the blueish tonalities and harsh vignetting for scenes where Roger East imagines/recreates/discovers what could had happen to the five ausie journalists. Or a parallel narrative.IMHO this grading decisions come from a context and are used for a context, here 1975 and 8mm (I think) shoulder style camerawork. Not a masterpiece but worth the watch =)
PS
Ok found some words from the director, Robert Connolly:I used ingenue lenses from the ‘70s, standard 16 lenses not super-16 lenses, I graded it – using Brett Manson, an amazing grader who also did Tsotsi – to make it look like reversal, we used a faster stock that had more grain in it and a whole range of things. We emulated the style of that time with the camera movements – handheld!
Viva Timor Lorosae!!!
-
Answer Prints are generally the highest quality print version of a completed motion picture! They are what's used to make the internegative that release prints are struck from.
There are fewer and fewer cinemas still using optical projectors. AFAIK the 4K (or 2K!) digital copy we now see projected is produced straight from the DI (Digital Intermediate not Digital Interpositive).
Personally I find a film shot on film stock simply looks better; i.e. clearer, more apparent resolution, smoother highlights, better shadow detail and, of course, they tend to be better lit and have bigger budgets and better scripts and everything.
By contrast, I have always found that the "looks like film" claim refers to a result which is often quite poor and looks like a poor film (ie so bad you can't tell the difference).
With a movie like Upstream Color there's something good going on which I can't quite put my finger on and I'd like to. Shot on a hacked GH2, it's got the right look for me and somehow I don't care if it looks like film - and this quality, for me, is the future for independent narrative film making.
-
@rNeil print stock is not a given part of the process, especially now. You aren't always looking at print or the influence of any print stock.
When you see a motion picture that has been shot on film and released as a DCP you're not seeing any release print stock. It's not part of the equation. It does not contribute to the look you see in the theater. Negative is scanned for DI, the digital interpositive. No print stock. No print stock lut.
Print stock luts are useful when you know you are going to be going back to film, to preview on a digital display before making that costly trip to the printer and lab. Apart from that I suppose it would be useful for emulating certain kinds of telecine material but, again, film to tape transfers aren't exclusive to print material.
Maybe there's something that I'm missing here but it's effectively anachronistic to use them in this way, for digital distribution and viewing. Unless you're simulating something like Technicolor's ENR, which is an enhancement to the look of a film exclusive to the printing process itself (which isn't what these print stock luts are doing), I'd need serious convincing before I believed the additional LUT for print stock emulation is anything but pointless and mildly destructive.
If you read the notes on the ultimate edition of Ridley Scott's Legend for BD release, they're basically apologizing for having to use an answer print to do this version of the film, because it was simply the highest quality material available. Answer Prints are generally the highest quality print version of a completed motion picture! They are what's used to make the internegative that release prints are struck from.
-
Those TJTFilm LUTs sound promising, but I don't see any info on whether they plan to sell them or not!
-
It's that bit @shian mentioned about needing BOTH the film stock data AND a print-stock data that most "film-emulaters" miss whether in still images or video. Coming out of a still-shooter background, I've seen SO many presets for say Lightroom that are things like "Tri-X @400", "Tri-X @ 1600", "HP-4" or whatnot.
Huh? No one ever looks at just the flipping negative, you look at the print! So ... that's always a combination of film and paper. Tri-X @ 1600 printed on say a grade 1 high-silver-content paper will have a particular look it will NOT share with the same negative printed on a grade 5 RC-paper. Maybe you like the second, fine ... whatever. It isn't the same at ALL. This has driven me nuts for the last decade.
Let alone considering that MY "pushing" of Tri-X to 1600 will never be exactly what YOUR pushing of Tri-X to 1600 will be in that negative film only.
After some of shian's comments here and a few others, I've found and read some about this ... including one dude who noted the amazing variability in how he uses his "chain" of home-made LUT's in his professional colorist work. Starting with a 'correction' LUT for a particular camera (sometimes even camera/lens), THEN a film-stock emulation LUT, then some correction work but as he's a hold-over from the "old" days and did corrections on film workflow, only the things he could have done there ... THEN a print-stock LUT with a few touches after that's put in place to overcome inevitable non-sequiturs in the process.
And depending on the cameras used in a project and the look the DP wants, it can be an amazingly complex chain of choices to get all the footage 'there'. So far past my knowledge/depth of understanding to be essentially Magic.
Great stuff ... but like shian, years of experience, accurate and useful knowledge, and access to all the stuff old and new to create valid comparisons. And this is just as lacking in most stills shooters/processors today as for video folk. Sadly.
But dang it looks pretty when done righteously.
Neil
-
^^^ that is exactly what I've been talking about. It hit every point and then some.
-
This seems relevant....
 British_Cinematographer_TJTFilm1.jpg900 x 1283 - 369K
 British_Cinematographer_TJTFilm2.jpg900 x 1283 - 396K
 -
@cyzercraft maybe it's Vimeo compression or your encoding bitrate, but I see a lot of fuzziness
-
@jpbturbo Man... lately you have this thing for telling the truth :P
@cyzercraft you did wrapped them well 4 sure.
Best of lucks -
That looks like instagram, not film.
-
And here is the last but not least! The main presentation of the thing I have been working on .. and yes it has a name now: EASY FILM
-
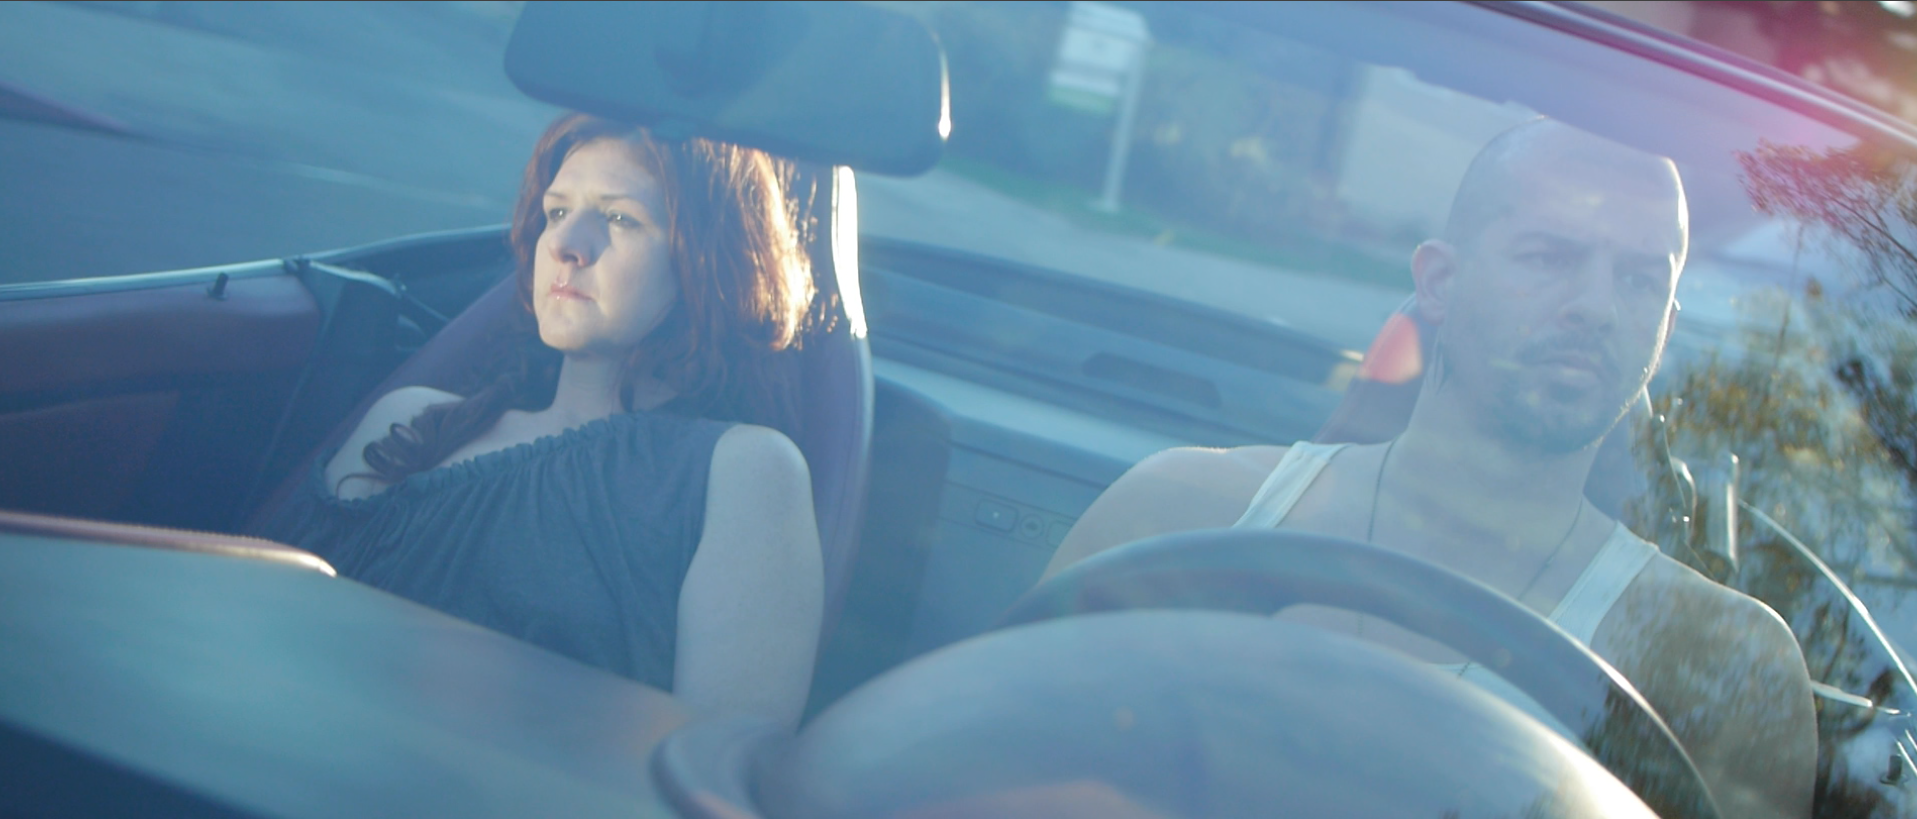
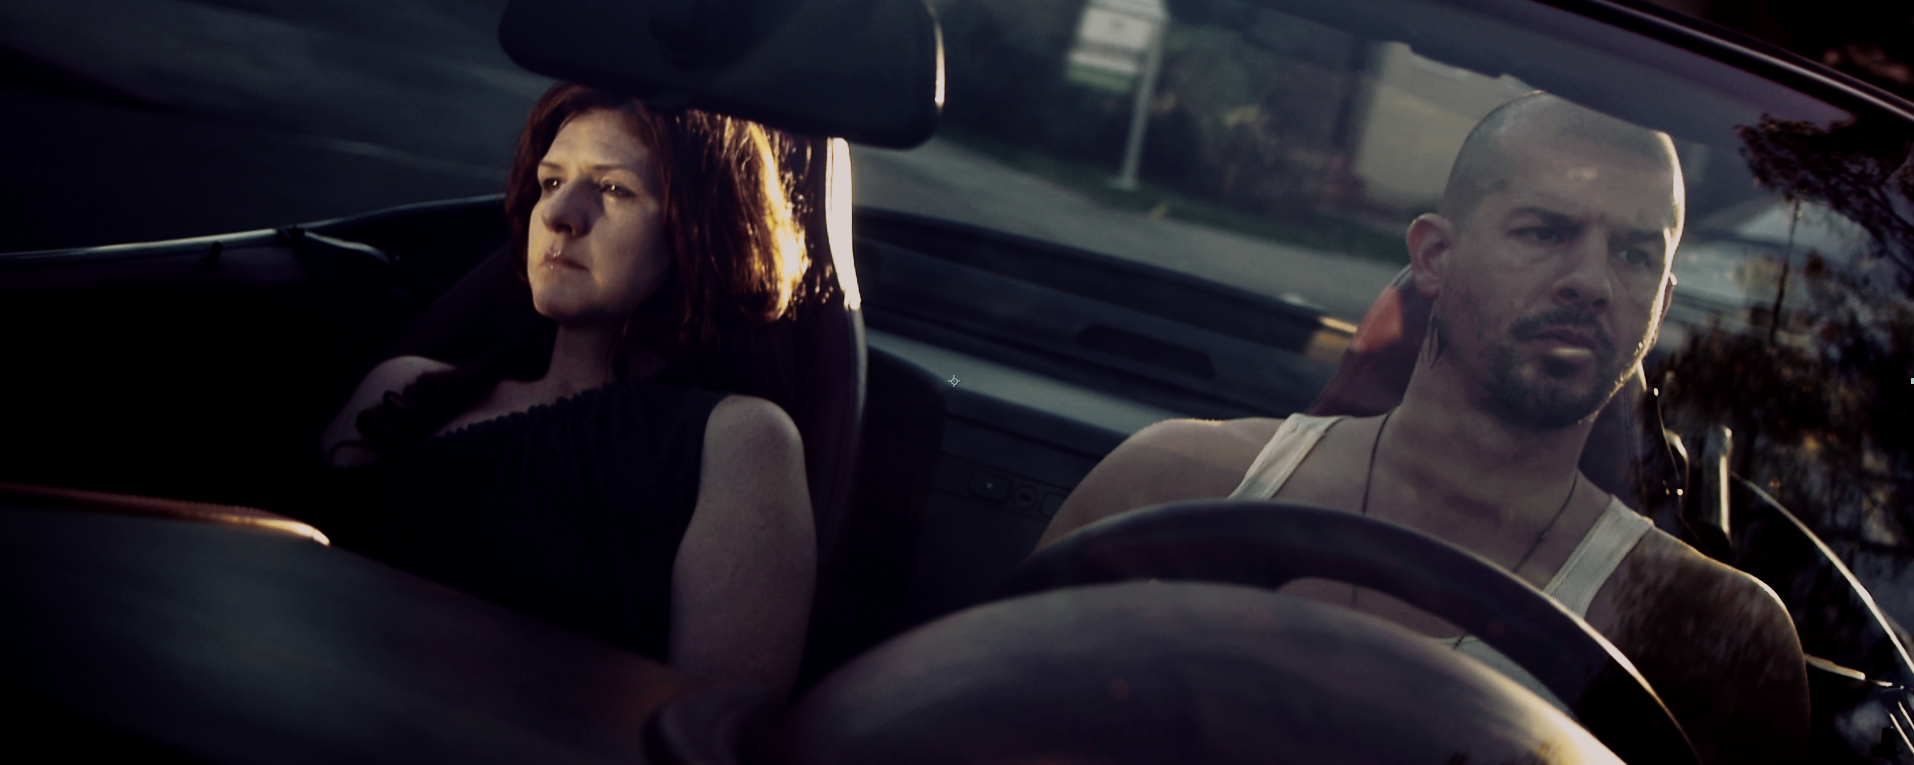
For actual results here is a comparison of raw GH2 footage shot in available light at golden hour with Pancake 20mm lens - with different film stocks applied - Vision 2 and the other with EXR. Created using the remapping process I discussed earlier, and then pushed down a bit to get the blacks to be inky.

 Screen Shot 2013-02-16 at 1.42.01 PM.png1917 x 819 - 2M
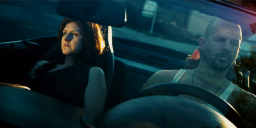 Screen Shot 2013-02-16 at 1.42.41 PM.png1919 x 819 - 2M
 Screen Shot 2013-02-16 at 3.32.10 PM.png1914 x 765 - 1M
 -
Agreed for the most part. I think it's the remapping part that most don't understand or the need to have a reality-based, non-subjective target or it's all just a lot of wanking.
The mechanics of Film Convert (and I'm assuming the CGPro mappings) are like a simplified, mini version of the ACES workflow. Both the digital camera + profile mappings as well as the scanned film stocks could be considered analogous to IDTs but rather than do the RRT to ODT through ACES color steps it just does the RRT from one IDT to a second, essentially, substituting the second IDT for ACES/OCES and without a proper ODT, leaving that up to the host application and operator.
I'm hoping they see the benefit of possibly migrating their work to an ACES compliant workflow in the future rather than building these little black boxes that try to do too much inside one tool. There standalone, for example, delivers lesser results than the plugin because it doesn't operate in a linear-float colorspace like you can within After Effects (used in an editor the results aren't as good also).
-
@BurnetRhoades - [copied from a response to a PM from another user] LOL no worries - It wasn't directed at anyone in particular, it's just a subject where everyone is looking for an easy fix, and everyone has opinions on how best to do it, but I did it at the highest level possible. I worked at Lowry Digital for 3 years as a Film Restoration Specialist and a Colorist where part of my daily duties was research and development for processes such as these.
Unfortunately those processes are patented by the company (Now Reliance Mediaworks) and I can't use them, so I had to go back to square one and develop my own processes. The rough basis of which I laid out in the post. I laugh at all those Osiris LUTs and people saying, "just download this Kodak LUT and apply it and it'll look like film." It won't. The footage has to be prepped, then remapped, then graded. It's very much like developing film. There is no other way. Film Convert does 1 and 2 for you. CG Pro gives you a lab in which to do all 3 in a way that gives you custom control over the "development" process from start to finish.
Reading that thread just made my roll my eyes. And it's a little like listening to a bunch of pre-teens talking about the best way to please a woman, when they've got no idea what the clitoris is, or where to even begin looking for it.
-
Ah, well, hopefully I wasn't one of the intended targets ;)
edit: since you mentioned it, it's too bad it looks like Fuji is getting out of the game. Whenever I see it picked over Kodak stock it's almost always used to highlight the differences. Like how it turned dirty subway flo lights into swimming pool blue-green for the American Hustle production. More and more we're going to see films shot on film using what they can get versus what they'd rather, in some cases.
I hope some fine fellows are busy mapping all those curves before there's no more film to measure.
-
Oops, sorry. That's cuz I left out the snarky remarks about how most of what has been discussed here is just people talking out of their depth (sometimes referred to as talking out of one's ass)... I decided to be civil for a change. I apologize. I don't know what came over me. It won't happen again. :)
-
@shian that didn't sound too controversial to me
-
I will probably start a shit storm here, but with the exception of BMD and other raw camera formats which are much easier to remap, remapping linear video into a log type environment is as much an art as a science. I know cuz It's been my job to explore this for the past 8 years.
The thing to keep in mind, and I did this with CGP, is that different film emulsions respond differently to each color channel of light with a different curve. And so the process is much like the process of audio sampling. To accurately remap the "line" of your video to this curve you will need somewhere between 16-32 sample points for each channel along each channel's curve, and a way to squish your original video into a faked log environment and then "project it onto" or remap it along the various curves.
This is how my LUTs work, and how Film Convert works (behind the curtain). I can't say which is better, or easier. I'm not here to sell you anything. only to tell you, that in order to do it accurately by hand you'll first need to know what those curves are, what their "inverse" is, and how each channel correlates not only to linear light, but to the unique color channel response of your particular camera. And then to finally bring them back into "white balance" because all of this will cause a noticeable color shift. And that's the magic ingredient. That is the hardest thing to accomplish. And the most misunderstood. Different film stocks will color your images differently. Fuji stocks sometimes produce ultra pink skin tones... like fuschia, and bluer than blue skies. Kodak stocks deliver a more red tone on the same skin without the blue burst, as I call it...and the idiosyncrasies go on and on. Or you need a shortcut, where someone else has figured this out and crammed into a LUT or series of LUTs like I have with CG Pro. And/or film convert. Osiris is a joke.
BUT
Be aware that most simple solutions are not gonna get you there. In my experience you need to "develop" your images in a 3-4 step process just like developing film, before you get an accurate result. And then there's grain which is a whole other can of worms.
http://www.flickr.com/photos/76276262@N04/sets/72157632784156675
-
@maxr I believe that LUT is designed for Davinci - which explains the bizarre results!


Howdy, Stranger!
It looks like you're new here. If you want to get involved, click one of these buttons!
Categories
- Topics List23,992
- Blog5,725
- General and News1,354
- Hacks and Patches1,153
- ↳ Top Settings33
- ↳ Beginners256
- ↳ Archives402
- ↳ Hacks News and Development56
- Cameras2,367
- ↳ Panasonic995
- ↳ Canon118
- ↳ Sony156
- ↳ Nikon96
- ↳ Pentax and Samsung70
- ↳ Olympus and Fujifilm101
- ↳ Compacts and Camcorders300
- ↳ Smartphones for video97
- ↳ Pro Video Cameras191
- ↳ BlackMagic and other raw cameras116
- Skill1,960
- ↳ Business and distribution66
- ↳ Preparation, scripts and legal38
- ↳ Art149
- ↳ Import, Convert, Exporting291
- ↳ Editors191
- ↳ Effects and stunts115
- ↳ Color grading197
- ↳ Sound and Music280
- ↳ Lighting96
- ↳ Software and storage tips266
- Gear5,420
- ↳ Filters, Adapters, Matte boxes344
- ↳ Lenses1,582
- ↳ Follow focus and gears93
- ↳ Sound499
- ↳ Lighting gear314
- ↳ Camera movement230
- ↳ Gimbals and copters302
- ↳ Rigs and related stuff273
- ↳ Power solutions83
- ↳ Monitors and viewfinders340
- ↳ Tripods and fluid heads139
- ↳ Storage286
- ↳ Computers and studio gear560
- ↳ VR and 3D248
- Showcase1,859
- Marketplace2,834
- Offtopic1,320


