
It allows to keep PV going, with more focus towards AI, but keeping be one of the few truly independent places.
-
@artiswar very nice! It makes me proud to see such great looking footage. As soon as I get out from under this current workload, I'll be shooting on 9b some myself. Nick Driftwood is a god.
-
@shian Excellent to know! Thanks for answering. Cheers.
-
In @driftwood, we trust. The export time on this was not half bad. I think it took about an hour and a half on my 2009 17" MacBook Pro with 4 gb of RAM. My next project, however, with the "Film Grain" gear and Neat Video is pushing 12 hours.
Really digging the workflow, though. I did this without a technical grade and just threw some gears on it. Worked well. Especially love the opacity control on adjustment layers in conjunction with CGT.
-
@spacewig - This test that I uploaded as well as a forthcoming skateboarding video were all heavily graded from MTS. I think as long as you're working in 32 bit color space you'll be fine.
-
If you started in 8bit and you well....say maybe....forgot to click the color space up to 32, can you simply change it to 32 before export? Not that I would ever screw up and do... that...it was some guy I know.
-
if you use my 444 Linear Off setting as your default it will warn you of a color space mismatch when you go to render.
But keep in mind, your dynamic range will change drastically from 8bit ot 32bit, so certain shots will look dramatically different from 8 to 32.
-
Listen up, if you want shit, you'll settle for shit, thats all Im gonna say.
-
@driftwood All I see here is people singing your praises, myself included. What's with the venom? Your work is outstanding!
-
@shian, tired... very tired... I don't want praise, I want results. Your work is outstanding. And that's all I care about. Tomorrow, Im gonna buy your plugin.
-
Appreciate what your saying. You've put in a metric shit ton of work just on your own. Just thought you'd like to hear my "results". Due to the image quality of your hack, along with some of my skills I've got my first and second paid jobs of my fledgling career and am starting a feature on a low to no budget feature with a peer of mine. Much of my success right now can be attributed to the versatility you've provided me. So thank you. I'll be sure to credit you, good sir.
-
@artiswar Nice job and wish you more success!!!
-
FINALLY!! I am dead tired, BUT Legacy support for CS4, CS3, and 7 Pro is now enabled. I can finally take a day off.
-
Another "Finally". I finally got part 1 of the Masks and Tracking Tutorial to successfully export. I had to re-record some of it, but It is now live on the site. It's a fun one, so enjoy.
-
awesome work @shian.. I haven't been able to keep up with all the added tutorials etc, but I'm really hoping to have time to dig into it and use it practically soon. I've been fishing for a job that would be a perfect learning curve!
-
I want to second how good this tool kit is. It's packed with great options. Also how good the tutorials are. I'm an intermediate AE user and I've learned a bunch of great little tips and tricks from you. Your experience shows and I appreciate you sharing the knowledge. Keep them tuts coming... : )
-
Quick CGT Grading on Footage shot with @driftwood Quantum v2. I really like the grain on v2, so I didn't use GHrain Killer much, except very lightly on the bathroom shot because the Blue Channel noise was insane. (The Raw of the bathroom wouldn't upload.)
Grade is simply - Toner, Grunge, Dense Night, and Spectral Enhancer.
These shots will be deconstructed in the ColorGHear Film School series, to teach you how to reverse engineer shots that you love so you can recreate these looks yourselves.

 Empathy RAW.png1920 x 818 - 6M
 Empathy CGT.png1920 x 818 - 5M
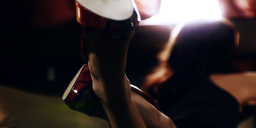
 Shoes CGT.png1920 x 818 - 6M
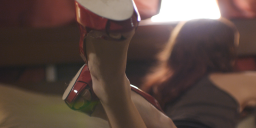
 Shoes RAW.png1920 x 818 - 6M
 bar CGT.png1920 x 818 - 4M
 bar RAW.png1920 x 818 - 3M
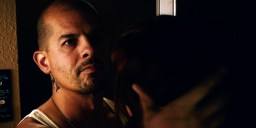
 Mark CGT.png1920 x 818 - 5M
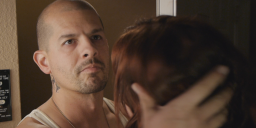
 Mark RAW.png1920 x 818 - 6M
 Bathroom CGT GK.png1920 x 1080 - 7M
 Bathroom CGT.png1920 x 1080 - 7M
 -
Bathroom comparison - along with details on the whole shoot.
All shots for the short film were shot on Quantum v2 (Mostly ISO 200, occasionally 400 and 800, smooth -2,0,0,-2, WB was dialed to 3200K not set by sampling, or with preset) Lenses were pancake 20mm f1.7, and Nikon 50mm f1.8.
HOTEL - Lit with (2) Dedo 100w lights, (2) 3200K 250w photo floods in the practical lamps with dimmers, (2) 2ft off-the-shelf electronic ballast flo fixtures, and a handheld LED camera light.
BAR - Lit with (1) homemade CFL soft box, (1) 3200K Arri 650w Fresnel, (1) 2ft off-the-shelf electronic ballast flo fixture, and a handheld LED camera light.
BATHROOM - Lit with (1) 2ft off-the-shelf electronic ballast flo fixture, and an LED camera light on a gorilla pod.
Teaser trailer coming next week

 Bathroom CGT GK.png1920 x 818 - 5M
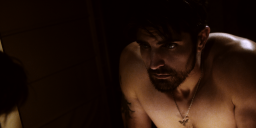
 Bathroom CGT.png1920 x 818 - 5M
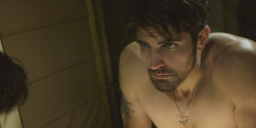
 Bathroom RAW.png1920 x 818 - 7M
 -
Just awesome! Can't wait for the next tutorials.
-
I last week upgraded to Media Composer 6 .. about three hours later I realised I needed to Upgrade Boris Complete. When I did that, it excluded an AE plugin called BorisAE Transfer which appears to work .. it enables AE to import AAF exported from AVID .. with options which I haven't tested. The AE transfer also brings up a FCP option .. even on windows.
Just an FYI
-
Great work, @shian !
I have a question: I have read a lot of people suggest in various threads that it is good to expose to the right of the chart, which I take to mean over by a few thirds. So, with slightly over-exposed footage, what would be the best way to stop it down in post - and in particular, using CG?
Thanks in advance for your answer.
Cheers
-
@spacewig there are 2 exposure GHears in the ADJUSTMENTS folder that can do this very quickly, they drop the exposure by approximately 1/3 and 2/3 of a stop respectively, anymore would dirty up the whites pretty badly.
Your other option is to remap the HMS in Color Finesse the way I did in the ColorFist tutorial using the pedestal adjustments.
-
Thanks, @shian
That's perfect, I don't think i'd ever need to drop more than one stop. I always use my light meter and crosscheck with the camera's meter and histogram.
-
I'm not sure I understand the question. Could you elaborate?
-
You could save the grades as user presets in AE.
-
No, if you are using the system correctly (read: modularly) you can't. The Sequences Addendum Tutorial lays out the quickest most effective workflow for nesting and grading footage with different looks. But much of this can be avoided by doing a proper Technical pass to balance everything out, and then a single style pass will suffice.
Howdy, Stranger!
It looks like you're new here. If you want to get involved, click one of these buttons!
Categories
- Topics List24,036
- Blog5,725
- General and News1,375
- Hacks and Patches1,153
- ↳ Top Settings33
- ↳ Beginners256
- ↳ Archives402
- ↳ Hacks News and Development56
- Cameras2,382
- ↳ Panasonic995
- ↳ Canon118
- ↳ Sony156
- ↳ Nikon96
- ↳ Pentax and Samsung70
- ↳ Olympus and Fujifilm102
- ↳ Compacts and Camcorders300
- ↳ Smartphones for video97
- ↳ Pro Video Cameras191
- ↳ BlackMagic and other raw cameras130
- Skill1,960
- ↳ Business and distribution66
- ↳ Preparation, scripts and legal38
- ↳ Art149
- ↳ Import, Convert, Exporting291
- ↳ Editors191
- ↳ Effects and stunts115
- ↳ Color grading197
- ↳ Sound and Music280
- ↳ Lighting96
- ↳ Software and storage tips266
- Gear5,420
- ↳ Filters, Adapters, Matte boxes344
- ↳ Lenses1,582
- ↳ Follow focus and gears93
- ↳ Sound499
- ↳ Lighting gear314
- ↳ Camera movement230
- ↳ Gimbals and copters302
- ↳ Rigs and related stuff273
- ↳ Power solutions83
- ↳ Monitors and viewfinders340
- ↳ Tripods and fluid heads139
- ↳ Storage286
- ↳ Computers and studio gear560
- ↳ VR and 3D248
- Showcase1,859
- Marketplace2,834
- Offtopic1,328
Tags in Topic
- gh2 1278
- gh1 196
- color 90
- grading 76
- effects 48
- after 47
- 5d 29
- correction 19
- 7d 13
- colorghear 11


