-
You can find it for very good price at
http://www.personal-view.com/talks/discussion/810/special-deals-complete-rigs-and-rig-parts/p1
-
Does this come with the lens support piece shown in the videos? I'm amazed by the pricing of this kit. Looks almost exactly like the Redrock DSLR Cinema Bundle for 1/3 the price!
-
Click on the link I provided, it has photos of all the items shipped.
-
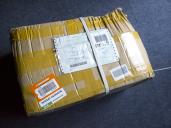
@Vitaliy_Kiselev As promised here is my in depth review of the cheap chinese rig.
Firstly I must say that contact with the seller was very good. I wasn’t charged any tax when the parcel arrived. Packaging was also good (see photo). I have been a professional camera assistant for years so am used to working with very good quality rental equipment that I could never afford myself.
Matt Box:
This was the first thing I unpacked. There were some minor scratches on it (see photo) but nothing to worry about. It comes with plates for putting into the filter holders which I haven't used. These are flimsy and be careful unpacking them because they will bend easily (see photo). The top and side flags work very well. The matt box is the most impressive part of this rig. It has a swing away feature which is like the pro models and great for changing lenses. It also comes with various size donut adapters for your different lenses.
Follow Focus:
I was very disappointed with this but wasn’t expecting great quality considering the price. The first thing I noticed was a huge amount of play on the rotary handle rendering it useless for shooting. I didn’t bring this out on my 2 day shoot last week. Yesterday I went back and upon closer inspection spotted 2 small alan key screws on the axil which I tightened up and this improved it a great deal. Now there is only minimal play in the gear wheel that makes contact with the lens. All though not tested on a shoot I think it may now be acceptable. The FF comes with 2 rings to attach to your lens. I use Zeiss C/Y lenses and the lens barrel is about 60mm. The rings supplied are too narrow for this size lens. When installed you have to put the gear wheel in so close that the FF gets in the way of the matt box and can’t be used. I have since found some focus rings online which add about 5-10mm diameter to the lens which may fix this problem. The rings supplied could be used on a big zoom lens that is 80 - 100mm diameter. The FF also comes with a speed crank and whip (see photos). I haven’t got the FF up an running yet but imagine it could be possible. The main problem is space - it is difficult to get the matt box right back to the lens and at the same time not get in the way of the mechanism (see photo attached).
The Rig:
The rig itself works. The major issue I have is that the bars all have a female internal thread and no male thread on the other end. This makes it impossible to join them up and extend them. The locking screws are also a little big so it is impossible to mount all the accessories side by side - you must leave room for locking/unlocking these screws. The rig is designed to have the shoulder mount off to the right (see photo). I tried this configuration but it was not at all comfortable and doesnt support any of the weight of the rig. You are still holding all the weight with you’re hand grips. I changed it around and put the shoulder pad in line with the main body of the rig and this works much better with a GH2 and a loupe (see photo). The only problem here is that you are limited for space on the main rods when trying to attach all the accessories. If they had of made the rods extendable this would not be an issue (male and female thread on each rod would be nice). The finish of the rods is also a bit cheap and the accessories need a bit of persuasion to be mounted or unmounted. The hand grips work well. I have it set up so I hold the grip on the right and the left hand grip is tilted in against my chest for stability when hand holding the camera. My left hand is on the barrel of the lens.
Overall impression:
I wanted to walk on to a film set and be taken seriously and look professional (first appearances and all that). This rig certainly does that. The matt box is great for the money. I left the camera in the rig (usually on sticks) for the whole shoot. Changing lenses was a joy. I didn’t use the FF but may have a look at this in the future. Overall this rig is a great starting point. I can buy rods and gradually up grade it if I need to. The build quality is pretty rough but it is rugged and sturdy. It will easily handle the abuse it may get on a long shoot. Overall I am happy I bought this rig.
 _1000387.jpg1200 x 900 - 731K
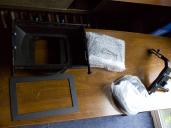 _1000389.jpg1200 x 900 - 693K
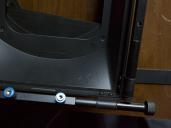 _1000390.jpg1200 x 900 - 530K
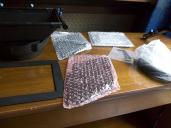 _1000392.jpg1200 x 900 - 701K
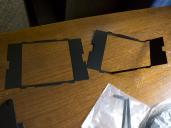 _1000394.jpg1200 x 900 - 751K
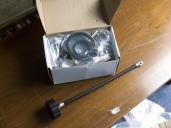 _1000395.jpg1200 x 900 - 675K
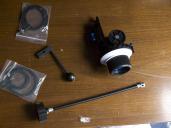 _1000396.jpg1200 x 900 - 748K
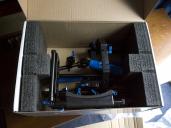 _1000397.jpg1200 x 900 - 683K
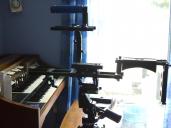 _1000399.jpg1200 x 900 - 460K
 IMG_5348.jpg1200 x 800 - 629K
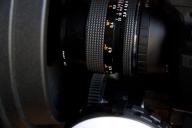 IMG_5349.jpg1200 x 800 - 396K
 -
To connect the rods you probably need just screw like this ;)
-
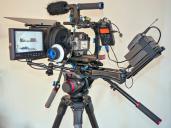
I also picked up this rig. The communication with R.J., as noted, is great. I asked him about the option of upgrading the FF to a QR version which he did for $18 more. He also gave me the option of two faster shipping methods - one for $21 and one for $56. I added the $21 shipping. I ordered it Thursday or Friday and had it the following Monday or Tuesday. Quite amazing to receive it in the US from HK in just a couple business days.
I swapped out the grips with some MTB ODI lock-on grips which make it look a bit more like the Tilta or Lanparte handles, as they have anodized lockrings. For whatever reason, the handles taper just at the point at which the lockrings contact, making it about .5mm smaller in diameter than a bicycle handlebar. I put a little Gorilla Glue on their to take up the extra space and make the lockrings hold tight. I do not use the cross bar, rather mount one handle in a vertical position right below the lens like a pistol grip.
I also made a few other modifications to make it more compact. I will post some photos very soon.
As @Albi mentioned, the offset shoulder mount does not make much sense, at least for me. I plan to order one of these to mount the shoulder pad just behind the baseplate: http://bit.ly/MjSJq2 I considered mounting the pad just as Albi did, though use the mounting plate to hold my cctc battery, which fits perfectly. I hold it in place with two velcro straps designed to hold a U-lock to a bicycle.
Overall the unit is very solid and I am very happy with it. Shot some footage at 140mm with it, should mounted and very happy with how stable it was.
My mattebox also had some serious scratches on this inside, not sure why. Several of my thumb screws were also pretty nicked up, though R.J. is sending me a couple new screws.
At some point will probably pick up some re-positionable/rotatable thumb screws for a couple of the parts, such as handles. Like these: http://bit.ly/O5TdP4 (Vitaley - forgive me for linking to this site, just have not found these anywhere else, currently). If anyone has another source for these, that would be great.
Also, put a Manfrotto RC02 QR mount and plate on top of the sliding plate to give the camera a little extra height so that I can run the mattebox high enough to not hit the rods. Actually not needed, as the baseplate it adjustable, though have RC02 mounts on tripods, gorrilapods and use the Black Rapid RC02 adapter, so like keeping the plate on the camera. Also mount the RC02 QR plate the long way,so that it does not interfere with battery port, making for quick battery changes when not using CCTV battery.
Since I now have the baseplate dropped all the way down, as RC02 plate gives extra height, there is enough space to mount the c-bracket directly below the QR plate (between baseplate mounts, giving extra space on the rods for everything else. While, it is a timely process to do this, as baseplate must be partially unmounted, I don't suggest this if you ever need to remove c-bracket quickly, though I always leave mine attached. Furthermore, because of this location for C-bracket, I may cut down top rods or just use 4" section I cut off from main rod, and cut the other one to give me a second 4" rod, as I no longer need such long rods on top.
The total unit is a bit heavier than I expected, which really just gives it extra stength. I cut one of the main rods down to match the size of the cross rod that the handles were supposed to attach to and use the two 12" rods as the main rods. After cutting the rod, I discovered how thick the actual aluminum (or aluminium for those outside the US) is that is used for them, Since the ends of all the rods are tapped, it makes them look very thin, when it fact the actual inner diameter of the rods (where they're not threaded) is 7mm, making the wall thickness of the rods a burly 4mm!
I also picked up a 1/4" by 20 tap to make a few more points to attach accessories.
Again, will get some photos up very soon.
-
@ sam_rides_a_mtb Very good! Do you mean a quick release FF unit? Damm! I wish I had have known that, I would definitely have went for that. How do you find the follow focus? Can you change gears on it etc? Is there much play in it? .... wondering if I could upgrade my one. A photo would be great.
That looks like a nice solution you have there for the shoulder pad too.
-
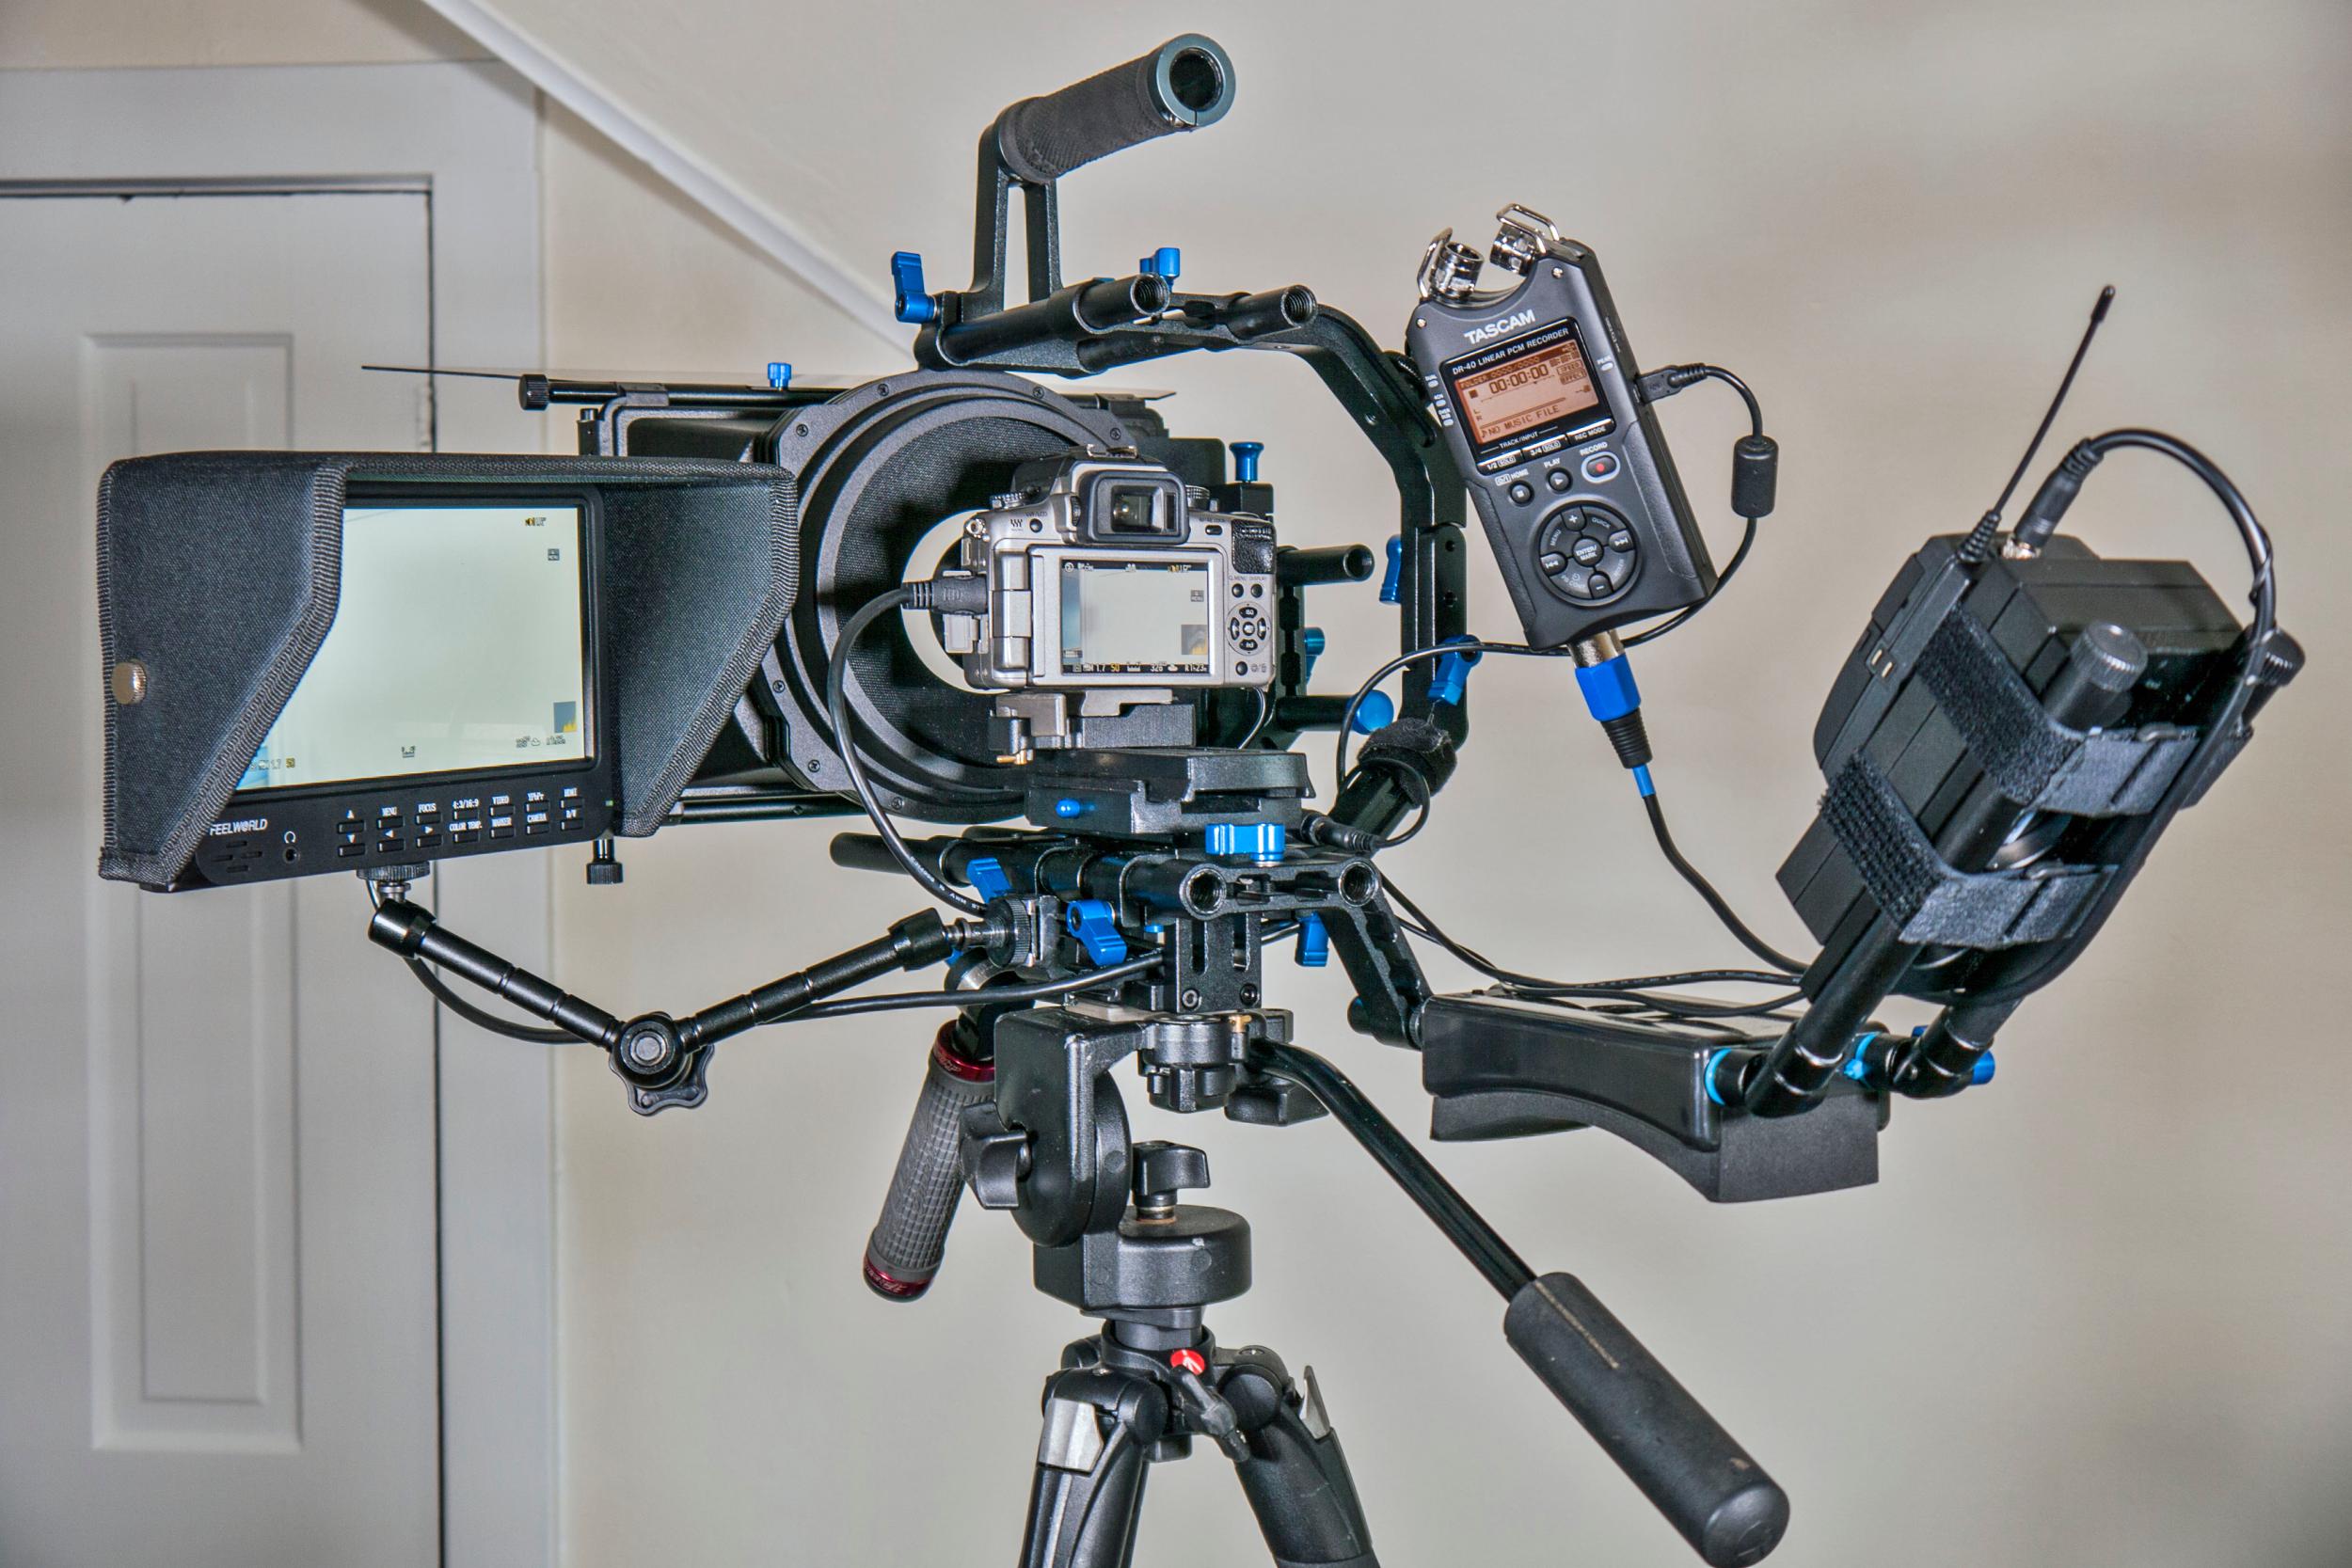
As promised some photos of my rig with GH2, CCTV battery, Tascam DR40, Feelworld 7" monitor, and Sennheiser G3 receiver. See details in post above.
 Sams Rig_1640350.jpg2500 x 1667 - 407K
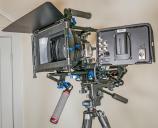 Sams Rig _02_1640362.jpg2500 x 2026 - 549K
 Sams Rig_03_1640347.jpg2500 x 1908 - 384K
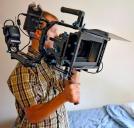 Sams Rig_04_1640339.jpg2500 x 2383 - 510K
 -
Cool rig! With the QR plate screwed on top of the sliding plate, does the GH2's body twist or torque when using a follow focus (or have you not tested it with the FF yet)? Your focus pulls aren't wobbly as others have noticed when only attaching the GH2 with one point rather than two? It was a huge oversight by Panasonic not to have a second locking pin hole on the camera body for a two-point connection!
How about the fact that the 1/4" thread on the bottom of the camera is not exactly centered? Any problems with the matte box?
I bought a basic rod system that looks to be the same as this one without the handles and shoulder pad (I'll add them later) and wanted to add an Arca-Swiss clamp to it with an Acratech 2173 anti-twist plate. However, the clamp could only be attached with one screw on the sliding plate... one step forward, two steps back on the anti-twist solution it would seem.
Do you suppose you'd have to permanently attach the clamp to the sliding plate with strong glue besides a screw so there is no possibility of the camera twisting with a follow focus?
Any thoughts would be helpful.
Oh, and what swivel arms are you using to attach your monitor and Tascam to the rig?
-
@JohnTollwannabe I saw someone else on here do the same thing with the QR on the sliding plate, and so gave it a shot. I have used it like this with a FF a couple of times with good results, though that was all handheld. On a tripod, you may see a bit of movement, though I have to test that a bit more. I do really have to tighten down the screws, though may look into some sort of custom anti-twist solution down the road. What I have found is after a lot of use, it may budge a hair, so I will loosen, reposition and retighten.
I just looked at my GH2 and you are right, the hole is like 1-2mm off center. Always thought it was perfectly centered, though did notice it sits a hair off center of the matte box. Actually thought it was a slight imperfection in matte box or base plate. Not enough of a problem to be a big deal.
The Arca Swiss clamps and anti-twist plate could be good, though on the sliding plate, kind of defeats purpose, as you said. I had considered removing sliding plate altogether and just using qr plate and clamp, somehow bolted to baseplate, though I realized I need a plate that slides. You could always get a lens support and attach a strap like that Varavon has to keep the camera from twisting, or even make something to attach to shoe of camera that then attaches to top rods. Though honestly thought it would be a bigger problem originally, and hasn't yet. Maybe we can get some others to chime in here about this.
Magic arms I found from New Jersey ebayer called EmilyandLily. They were dirt cheap, maybe $20 a piece and didn't expect much from them, though they work pretty well, granted the monitor and Tascam are really light.
The monitor's arm is attached to a piece of a flash bracket that I sawed down and bolted inside of base plate to extra tripod mounting hole.
Still waiting on new rod riser to position shoulder pad directly inline, which is my only gripe at the moment.
Just a side note, the Feelworld monitor is truly amazing. The image is super bright and clear and everything works like it should with no overscan or stretching.
-
Thank you for the detailed response! Yeah, there are a lot of little "issues" when it comes to working with the GH2 to over come, but it's still an awesome bang vs. buck camera once you master your cinematography skills! :)
I'll have to check out that Ebay seller and the monitor. Good tips!
And hopefully we'll get some more ideas for anti-twist rig solutions that don't break the bank.
-
A couple updates to my rig. Finally got the normal (as opposed to offset) riser which puts the shoulder pad closer in. Wired in a voltmeter to let me know when the battery needs to be switched over. Also got a simple little mount to attach my mic, though need to find a regular 2.5mm extension that is something like 100mm. Right now I am using a reducer and enlarger with a 3.5mm cable in between.
Also picked up a more solid tripod and head that seem to work nicely so far - need to really test more but so far a huge improvement over what I was using. It was the combo 504HD head and 536 carbon legs where you save $100 buying together plus they include a really nice padded bag that normally costs $100!
Had a recent shoot that went really well. The monitor makes a huge difference in getting focus spot on! Can't say enough good things about it. Only thing about the monitor (or maybe it has to do with the GH2s output) but the refresh rate seems kind of low. When I pan, the image jumps a tiny bit, where as on the cameras LCD and when played back on a computer, the image is fine. Learned to deal with it.
Also secured the 2 multi-voltage batteries with 3 strips of velcro that holds really well plus the outer velcro strap. Have to do more long term testing with these batteries, though so far they have lasted pretty long. The last shoot, I used just one for several hours powering GH2 and DR40. Now, I also power the monitor with it, though I must test to see at what voltage I must recharge.
All in all, been really happy with the setup. At some point will look into getting carbon rods to drop some weight. Might do a little milling here and there, as well.
 Sams camera_01a_1640413.jpg1920 x 1440 - 318K
 -
Looks great! :)
I bought basically the same rig baseplate and rod rails to get the ball rolling. I don't know if carbon rods will really help much. The weight seems to be almost entirely in the camera platform and mounting plate. They're a couple of pretty good chunks of metal. It's not horrible in this regard, and it seems well constructed for the beginnings of my first "starter" rig.
The jittery panning motion using the HDMI output may have something more to do with the crippled signal the GH2 is outputting rather than anything to do with your monitor. The field cadence for the 1080i video is slightly off the norm (it's not the standard 59.94 fps) besides having a weirdly gimped 4:2:0 color space.
I'm now thinking about a better tripod and that same Feelworld monitor. Where did you end up getting that Manfrotto package deal from??
-
I just ordered it. Express shipping cost me 30$ more for Switzerland and I also asked for the QR FF, for 19$. He told me about the possibility to get the aluminum case for 20$ more but the shipping cost would be 90$ extra (because the package would be heavier and bulkier). I didnt took the case afterall. I cant wait to use the rig! Any recommendation on the setup aside what has been already discussed?
-
I am hoping to get this awesome looking rig soon. What do you folks use to attach a shotgun mic with shock mount to it?
-
Anyone?


Howdy, Stranger!
It looks like you're new here. If you want to get involved, click one of these buttons!
Categories
- Topics List23,988
- Blog5,725
- General and News1,353
- Hacks and Patches1,152
- ↳ Top Settings33
- ↳ Beginners255
- ↳ Archives402
- ↳ Hacks News and Development56
- Cameras2,365
- ↳ Panasonic994
- ↳ Canon118
- ↳ Sony156
- ↳ Nikon96
- ↳ Pentax and Samsung70
- ↳ Olympus and Fujifilm100
- ↳ Compacts and Camcorders300
- ↳ Smartphones for video97
- ↳ Pro Video Cameras191
- ↳ BlackMagic and other raw cameras116
- Skill1,960
- ↳ Business and distribution66
- ↳ Preparation, scripts and legal38
- ↳ Art149
- ↳ Import, Convert, Exporting291
- ↳ Editors191
- ↳ Effects and stunts115
- ↳ Color grading197
- ↳ Sound and Music280
- ↳ Lighting96
- ↳ Software and storage tips266
- Gear5,420
- ↳ Filters, Adapters, Matte boxes344
- ↳ Lenses1,582
- ↳ Follow focus and gears93
- ↳ Sound499
- ↳ Lighting gear314
- ↳ Camera movement230
- ↳ Gimbals and copters302
- ↳ Rigs and related stuff273
- ↳ Power solutions83
- ↳ Monitors and viewfinders340
- ↳ Tripods and fluid heads139
- ↳ Storage286
- ↳ Computers and studio gear560
- ↳ VR and 3D248
- Showcase1,859
- Marketplace2,834
- Offtopic1,320
Tags in Topic
- rig 106


