It allows to keep PV going, with more focus towards AI, but keeping be one of the few truly independent places.
-
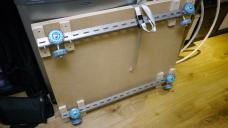
Wondering if anyone has purchased this type of wheel/swivel assembly before. Curious to hear what others think about it. Trying to get the smoothest ride for under $100. Thanks.
-
Meant to say smoothest ride for under $200
-
I made the mistake of using skateboard wheels(90-100A durometer) for my first dolly. Even on smooth steel pipe it was rough, especially on the joints even though I took great care in fitting the joints tightly. I then switched to rollerblade wheels (72A) which were MUCH softer. The other thing is that pairs of wheels like those in that auction will always tend to bump over things. This is because as one pair of wheels on the truck hits a bump there is only one other pair on the same truck to support the weight. When I made new trucks with the rollerblade wheels, I used 4 pairs per truck. This would roll over the joints, dirt, grass, etc, that would get on the track during shooting without so much as a sound.
I designed mine like this one:
-
@svart - do you think that softer skateboard wheels would be fine? It seems like they'd have more surface area which would touch, which would be a benefit. Also, what are you using for tracks?
-
I used roller blade wheels from the thrift store that costs me $2 for the pair! The wheels ride on 6 feet of electrical conduit. Turned out pretty good.
-
I'm using 1-1/4 electrical conduit as well for the tracks. Cheap and pretty straight. Some conduit is much smoother than others so shop around. I used 1-1/4 oak dowels that I turned down in a lathe to fit the ends of the track sections together. I took a lot of time to make sure the conduit sections were exactly the same length and cut square on the ends so that none of the sections would have gaps.
I made 5x 6ft sections using 2"x1" oak strips laminated together to form 2x2 crossties. I tried pine at first but over time they would split. The glued oak is incredibly strong and a lot cheaper than using steel tubes for crossties.
Skateboard wheels don't come in very many ranges of hardness unless you get into the big downhill board wheels. Those are just crazy expensive. Another option is the "jelly" rollerskate wheels but those are pretty expensive as well. As far as the contact patch is concerned, any wheel is only going to touch the track in a very small patch. Having a really wide wheel doesn't do anything for you unless their is some kind of inconsistency in the truck design. I tried a few different kinds of wheels and the rollerblade wheels were cheap and soft. I already had the bearings from a couple sets of rollerblades I got at the thrift store(as well) for testing. The wheels didn't match so I ended up getting 4 sets of matching factory seconds from EBAY . I think they cost me like 30$ or something.
I think the track cost me 130$ for 30ft. The wheels and trucks cost me around 100$ all together. The doorway dolly I made that rides on the trucks cost me another 100$ or so but it's steerable and has slick cart tires and stuff. All this was designed to hold the weight of 2 people and camera equipment so I made it really robust.
-
In addition, the single most handy thing I made to go along with the dolly are two buckets of wood blocks and shims. Those make leveling the track go 75% faster. I also bought a rubber mallet and a magnetic level and keep all of this stuff in a couple 5gal buckets with the dolly/track.
-
Svart, that is an awesome looking dolly you've built. Thanks for all this info, you convinced me to take a different approach to designing this thing. What I have now is a set of used inline roller blade wheels I got at a thrift shop. I attached them to some PVC and run this over a track which is also made of PVC..I never really considered electrical conduit for the track, but it makes sense that it would be much smoother than the plastic. I think my other issue is I didn't space the wheels with the exact precision required. I know if they're slightly off in spacing, this will cause an uneven ride. That's why I figured I would buy something from someone who knew what they were doing as far as the wheel construction on the device.
Pete, very nice video, nice and smooth. I'm think I'm going to look at some newer rollerblade wheels and electrical conduit and go back to the drawing board before sinking a lot of money into these things.
Here's a link to some examples using my current setup. I actually made this a few years ago when I was using the HV40, before the GH2. Its just too bumpy for my liking.
-
@Bostonmike, that's not my dolly in the pic, although mine does look like that. :)
The PVC is smoother but it's not robust enough to hold weight. What you'll get is an undulating motion as you go over the crossties. I tried using heavy duty PVC originally but it just couldn't hold up.
If you need to drill/tap for wheel bolts, just take your time and measure carefully. I use a set of electronic calipers and a carbide scribe to mark the right distances. I then take an old tap and use the pointy end to create a dimple at the drill point. That way the drill bit doesn't walk around and your hole will be exactly where you want it.
-
I like the dollie wheels in you first post. I mike order tomorrow.
-
Svart, I think I'm going to take your advice, order a few sets of nice new roller blade wheels on Ebay and really take my time drilling those holes. I'm going to try the conduit instead of the PVC. Thanks a lot for the advice!
-
Brian, they do look nice and they swivel...let me know what you think of them when you get them, thanks. I'm going to go back to the drawing board and try to do my own again with the rollerblade wheels.
-
Re testing grip gear:
I've just started using a smartphone app which utilises the phone's accelerometer to test vibration. I'won't name it because there are plenty of these apps. I should be able to mount my phone on a rig, move the camera through its tracking shot and check the graph the phone produces. Any bumps should show up very clearly. I bet there are specific apps produced for film grips, too - but I like mine; it's also got a decibel meter.
-
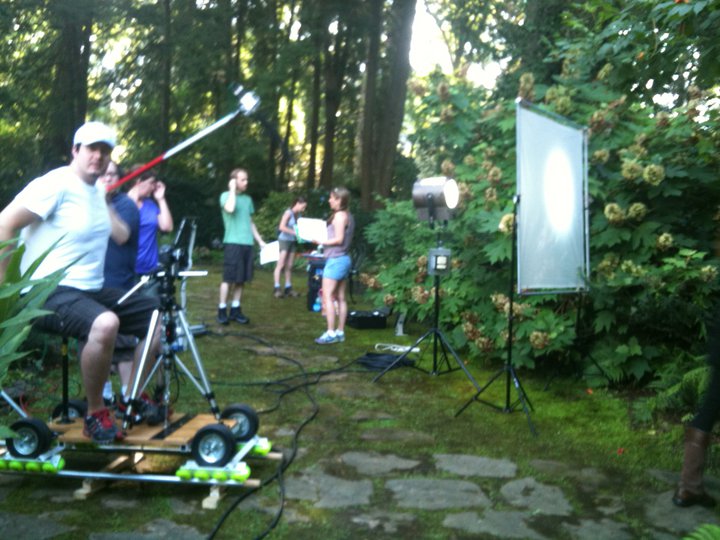
Here's a pic of the dolly and track in use while shooting:

-
Great pic, thanks Svart!
-
Oh I found another pic and it has one of my homemade HMIs in it too.:


 268934_10150239761124267_810304266_7140997_854226_n.jpg720 x 540 - 94K
 -
Hey @svart @bostonmike and all.
I just put together my own DIY dolly last night, ready for a short we're shooting over this weekend. I've used 40mm waste pipe, 3 x 3m connected for each track, so a 9m run. I'm quite pleased with it, but it's no where near as good as your @svart.
It's only designed to take the weight of my rig. I think if I added an extra 8 wheels it's take more weight. I'm quite pleased with it though, for something that I knocked together in a night :-).

 diy_dolly01.jpg1280 x 720 - 262K
 diy_dolly02.jpg1280 x 720 - 325K
 dolly_on_track.jpg960 x 1280 - 355K
 -
Looks good! Congrats!
-
Very cool setup, nice job. I'm finally going to tackle my own in a couple of weeks since I entered this film contest next month. I want to have a nice smooth tracking shot to open it with. Svart's dolly is the Mercedes of film dollys...haha I like that lighting setup as well.
-
@Svart homemade HMI you say? I'd be interested in learning about that!
-
Cheers guys.
I added an upright pushing pole tonight too. I though pushing the dolly via the tripod might introduce a bit of shake.
-
I have these:
They work very well
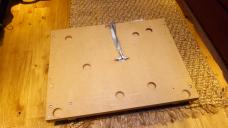
I sandwhiched and glued 2 peices of 9mm external ply .. it gives an 18mm thick platform to ride on.
-
I built that HMI from a high pressure sodium ballast (the metal box hanging on the side of the stand and metal halide light). A lot of the guys who build home theater projectors use this kind of setup with the ballast and bulbs. I put it in an old 8" fresnel housing(barely fit). I also made that diffuser out of rip-stop nylon, some press-in grommets and the frame from electrical conduit/elbows. I should probably make my HMI builds into another thread..
-
@svart: Please do, would be very interesting! How much effect is it?
-
One solution for a better/ stiffer joint is to use a mitre saw and cut the ends at 45 degrees not 90. This will spread the load on the joint over a greater area and increase the surface area where one joint buts against its opposite
-
For connecting lengths of track together, I used 9'' sections of the same 1 1/4'' conduit pipe as my main rails, and cut a 3/4 inch wide slot out of the length of the connecting pipe. This allows you to compress the connecting pipe so it will fit inside two lengths of track - as it expands again, it gives a very snug, tight fit.
Howdy, Stranger!
It looks like you're new here. If you want to get involved, click one of these buttons!
Categories
- Topics List23,992
- Blog5,725
- General and News1,354
- Hacks and Patches1,153
- ↳ Top Settings33
- ↳ Beginners256
- ↳ Archives402
- ↳ Hacks News and Development56
- Cameras2,367
- ↳ Panasonic995
- ↳ Canon118
- ↳ Sony156
- ↳ Nikon96
- ↳ Pentax and Samsung70
- ↳ Olympus and Fujifilm101
- ↳ Compacts and Camcorders300
- ↳ Smartphones for video97
- ↳ Pro Video Cameras191
- ↳ BlackMagic and other raw cameras116
- Skill1,960
- ↳ Business and distribution66
- ↳ Preparation, scripts and legal38
- ↳ Art149
- ↳ Import, Convert, Exporting291
- ↳ Editors191
- ↳ Effects and stunts115
- ↳ Color grading197
- ↳ Sound and Music280
- ↳ Lighting96
- ↳ Software and storage tips266
- Gear5,420
- ↳ Filters, Adapters, Matte boxes344
- ↳ Lenses1,582
- ↳ Follow focus and gears93
- ↳ Sound499
- ↳ Lighting gear314
- ↳ Camera movement230
- ↳ Gimbals and copters302
- ↳ Rigs and related stuff273
- ↳ Power solutions83
- ↳ Monitors and viewfinders340
- ↳ Tripods and fluid heads139
- ↳ Storage286
- ↳ Computers and studio gear560
- ↳ VR and 3D248
- Showcase1,859
- Marketplace2,834
- Offtopic1,320
Tags in Topic
- dolly 24


