
Please, support PV!
It allows to keep PV going, with more focus towards AI, but keeping be one of the few truly independent places.
It allows to keep PV going, with more focus towards AI, but keeping be one of the few truly independent places.
My 110 Mbps High Contrast Example
-
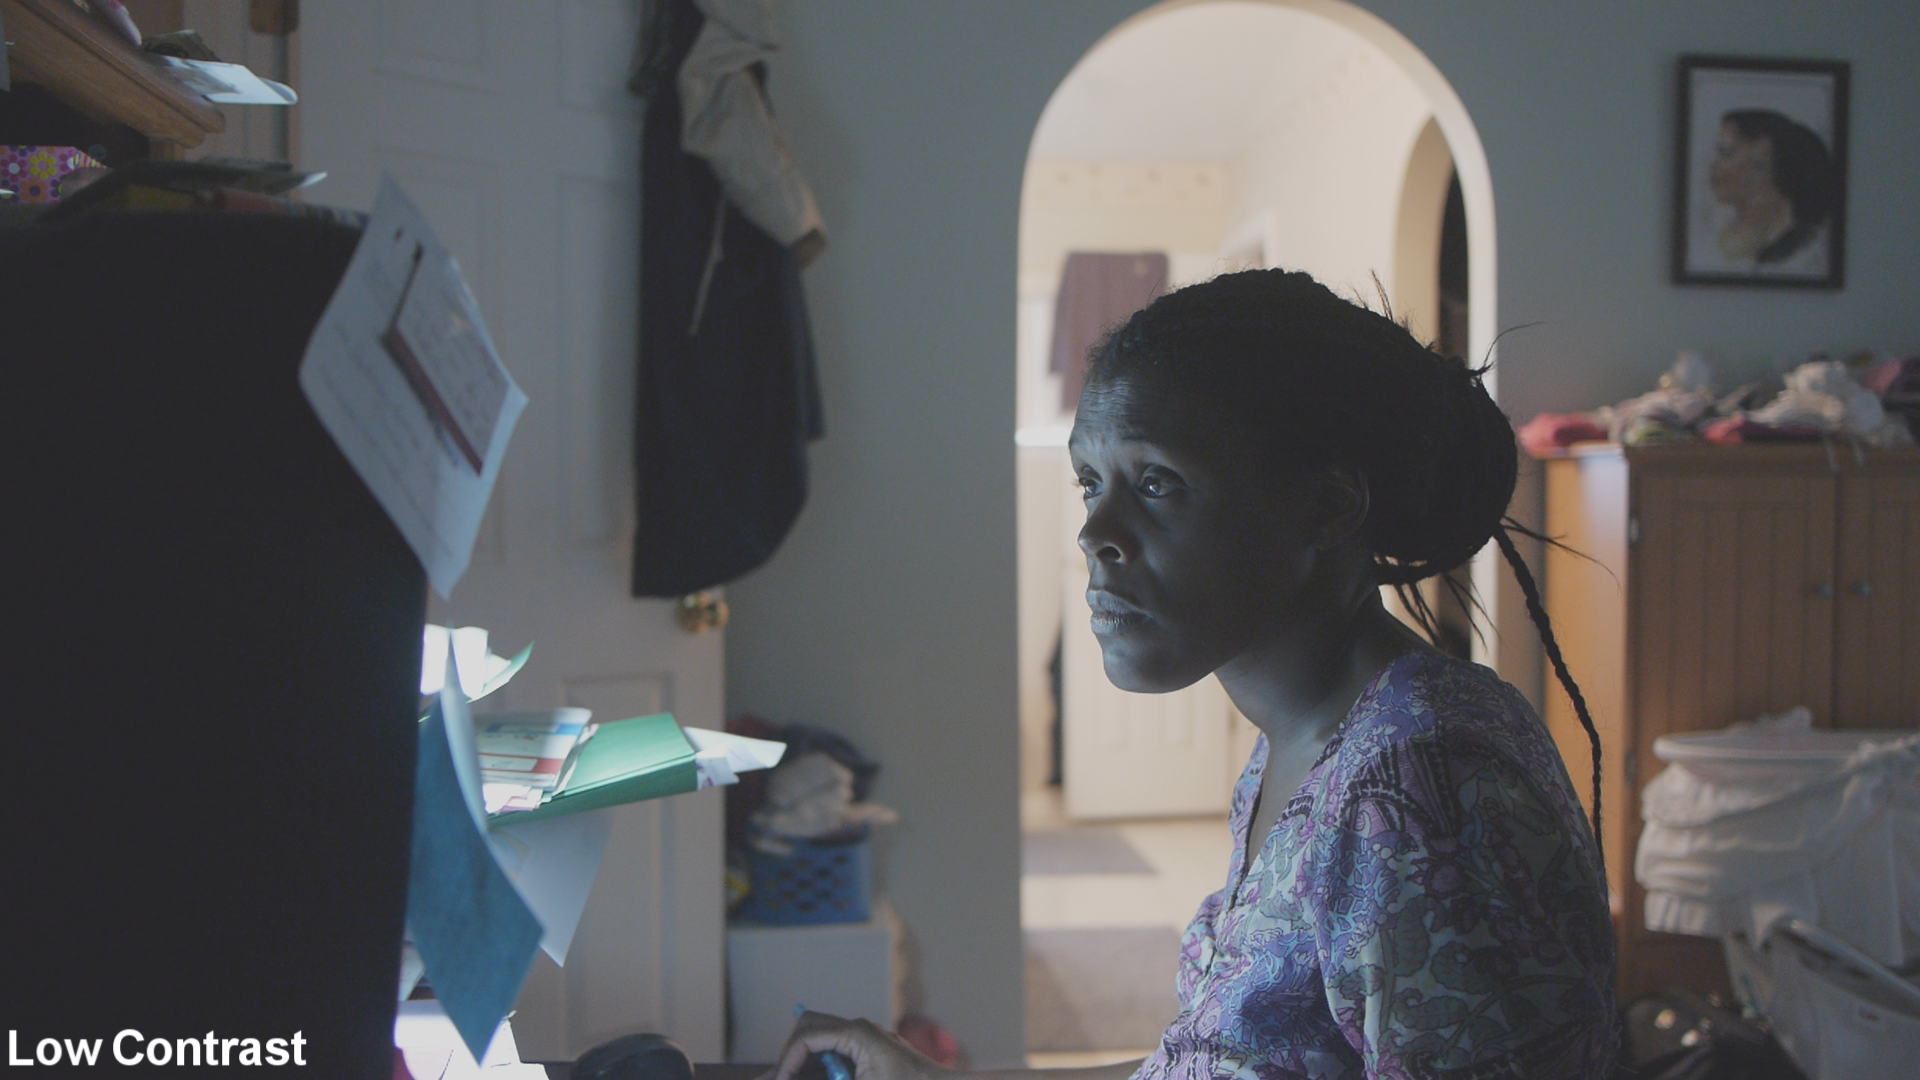
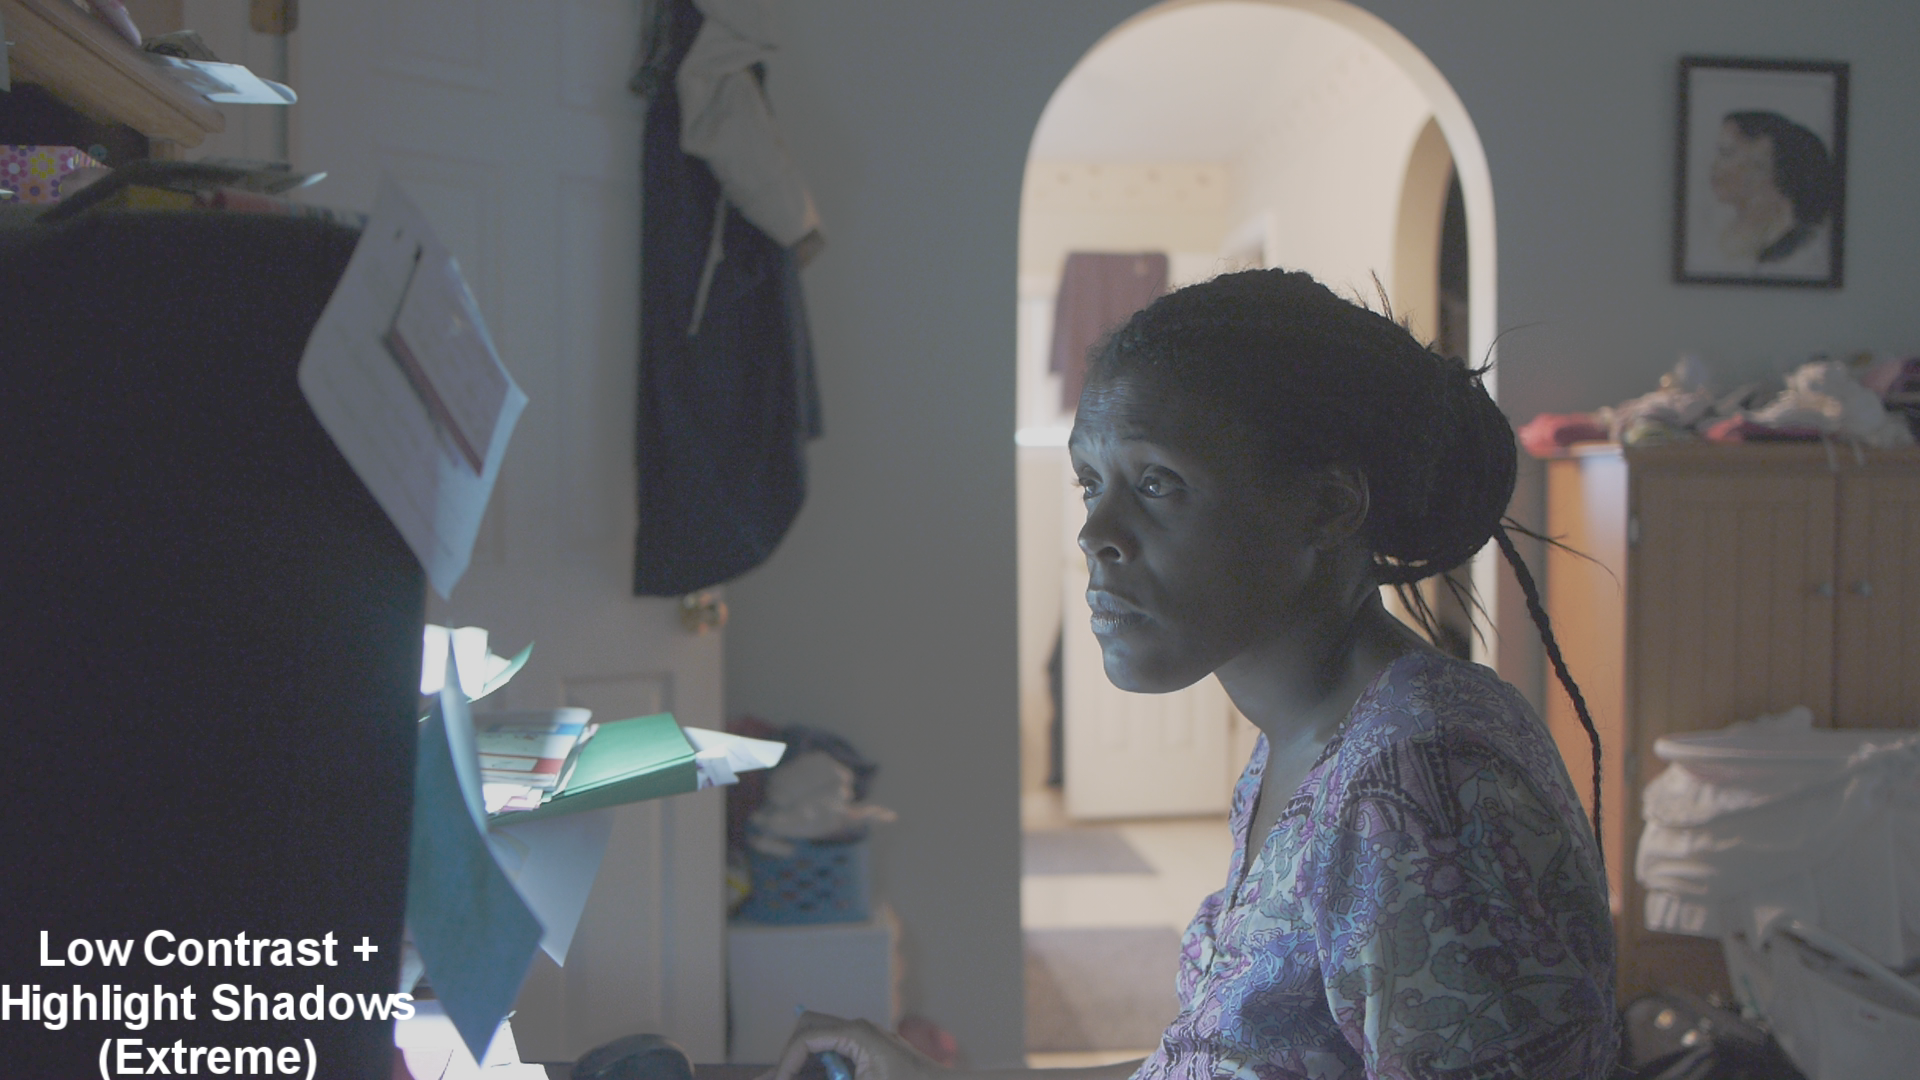
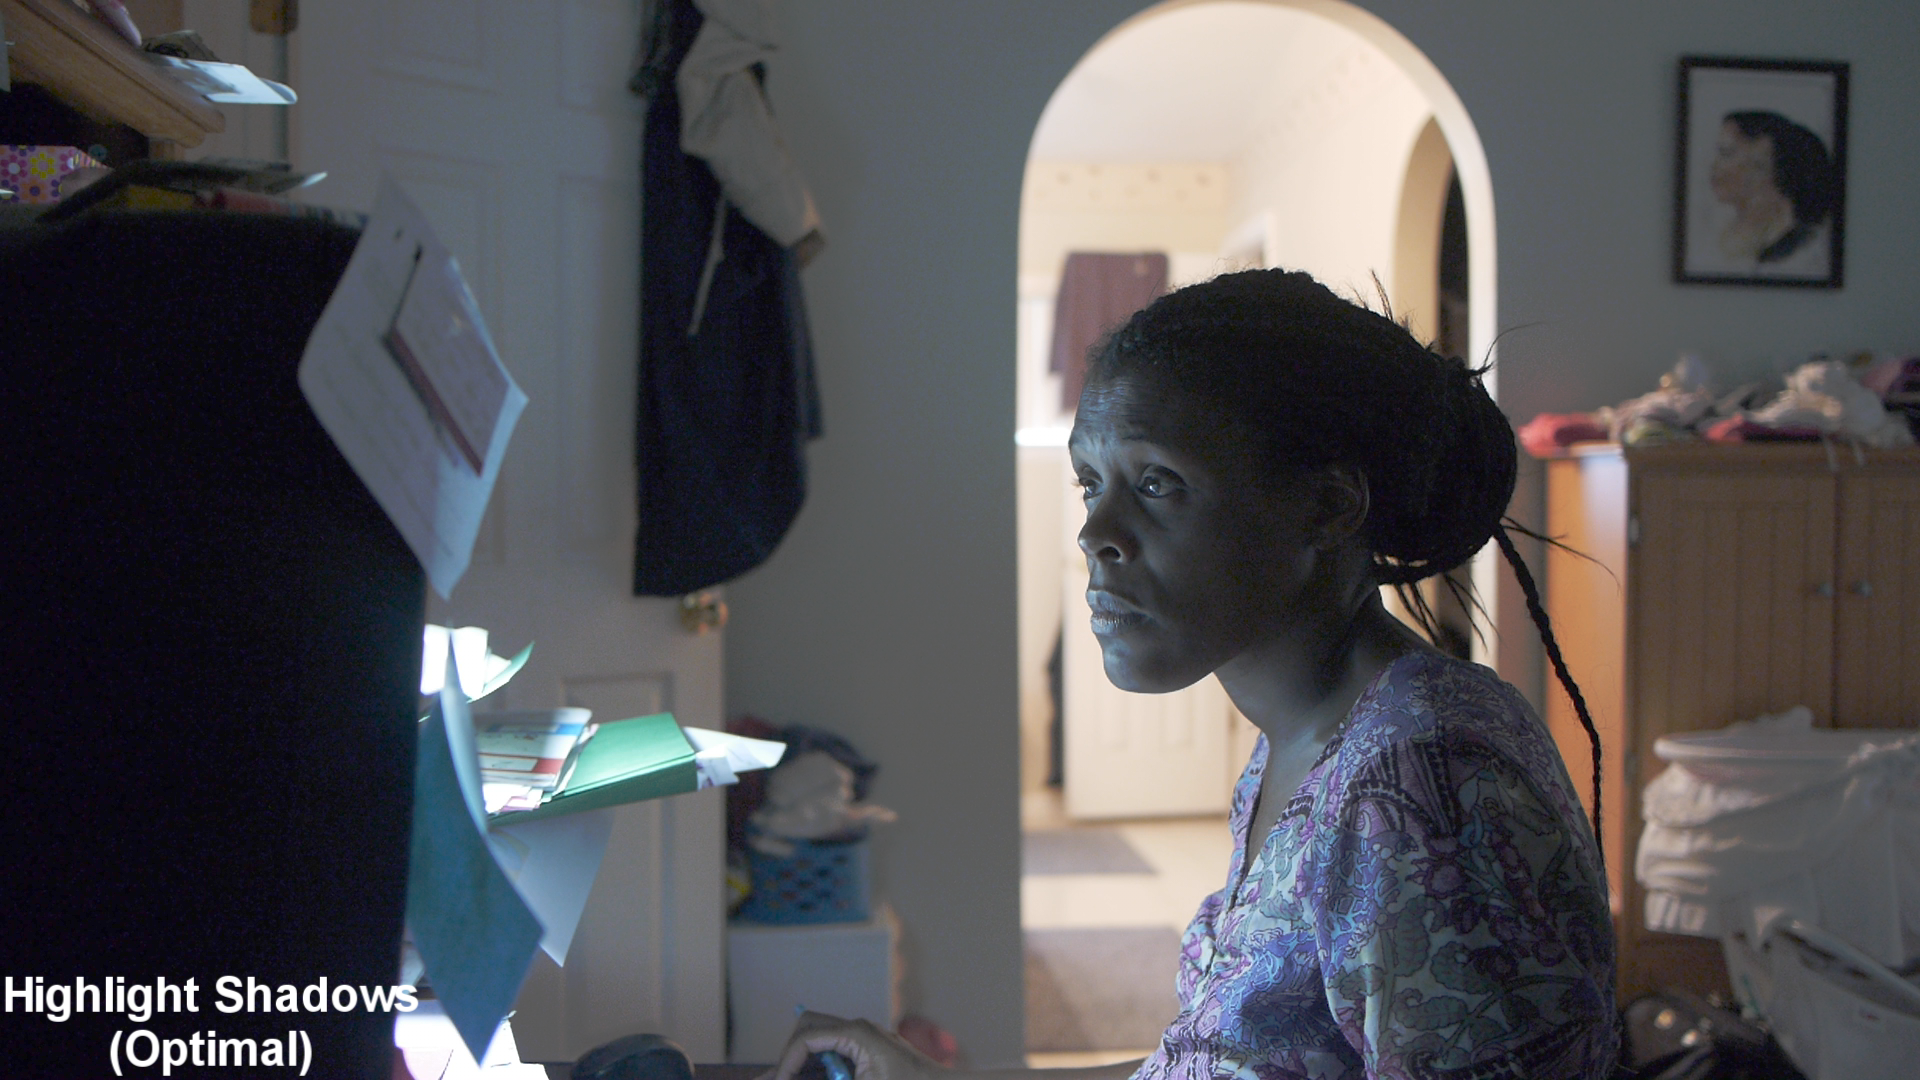
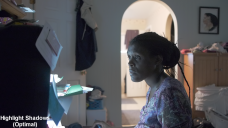
Below is an example of the detail I can get out of a high contrast shot when using an extremely high data rate. I attached 4 iterations of the same snapshot view from a video I took last night. In this example I'm using Henry Olanga's 110 Mbps PTool settings to film my (7 month pregnant) wife. You can see the original file is high in contrast. I had the camera set to Nostalgic mode 1/50 shutter and 640 ISO (it could have been 800 ISO since I was dancing between the two ...so I'm not quite sure at the moment).
What I did was play with some extreme settings to see what (if any) I could recover in the shadow areas. You can see in the next clip I lowered the contrast a bit. Then in the following clip I lowered the contrast and highlighted the shadow areas. It's a bit extreme....but this was purposely done to see how far I could push the image. Before the hack...most of this would have been a noisy mess (compression artifacts/smeary dark areas/macroblocks etc). What the hack allows is for detail to stay put in the dark areas with a lot less hassle. In the last image I just highlighted the shadows of the original file. That would be the optimal setting I'd apply for an image like this. Others may do differently....but at least we have somewhat of an option now.
For those who claim they don't see any benefit of the hack vs the stock video....I'd say this is good enough evidence "favoring" the hack.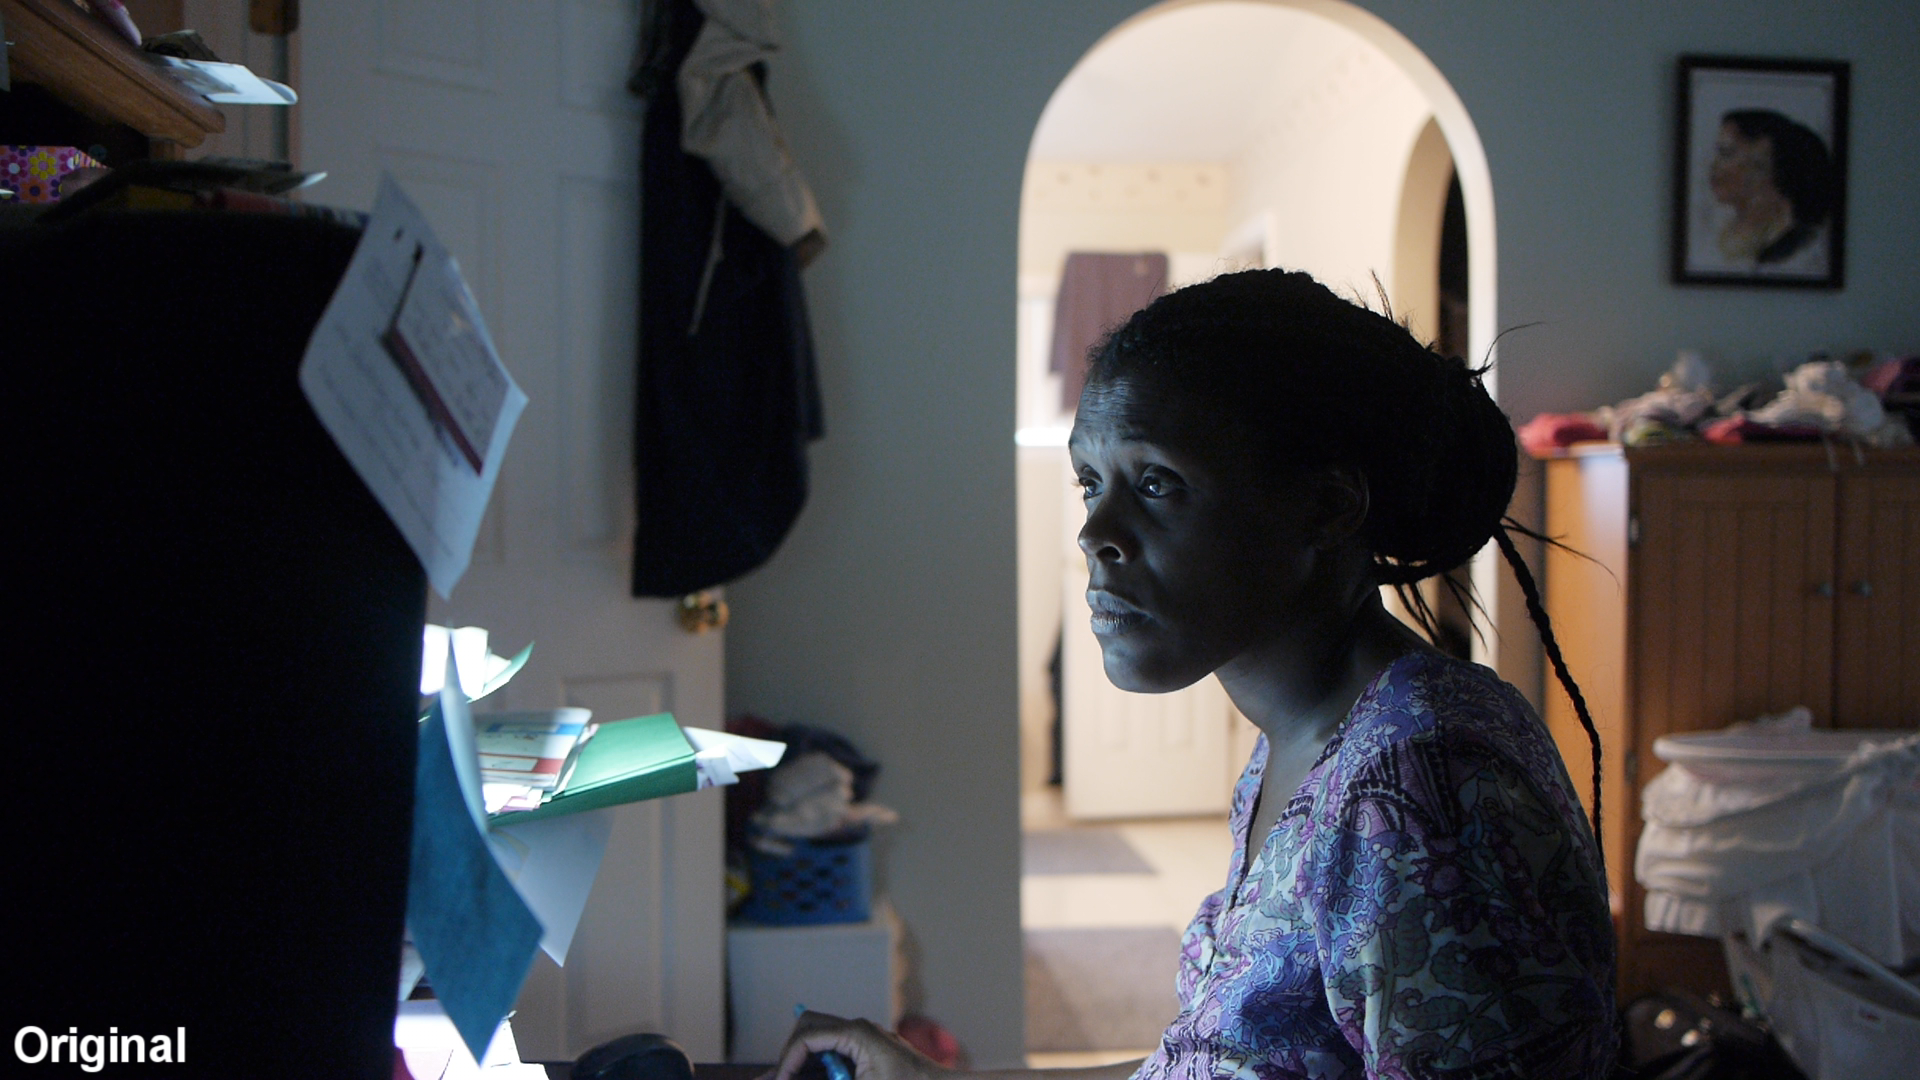

 untouched.bmp1920 x 1080 - 6M
 lowered contrast.bmp1920 x 1080 - 6M
 low contrast highlight shadows.bmp1920 x 1080 - 6M
 highlight shadows (optimal).bmp1920 x 1080 - 6M
 -
thank you for the test. Indeed it looks very good but wouldn't it be 10 times more conclusive if there was a "lifted" version of the unhacked in there too? Although you're probably correct, it is still a hypothesis that the unhacked would have behaved worse.
-
You're correct that a before and after would have been more conclusive. But that wasn't the inention of this particular test. It was really only meant to show an example of what I am seeing in the dark areas of slightly underexposed images. I guess if I have time I'll do a before and after in a more controlled environment.
@jax Good job. I like Neat Video myself. -
How would you remove the noise on her face?
-

 Comp 1.bmp1920 x 1080 - 6M
 Comp 1.bmp1920 x 1080 - 6M
 Comp 1.png1920 x 1080 - 2M
 -
@stonebat This was shot with noise reduction completley off. If I had shot this scene with it set to "0" it would have looked a lot better I think. It's shots like these where I would recommended the use of in cam noise reduction. But I leave it off 99% of the time.
-
@Ian_T: Which camera settings did you exactly use for the third snapshot (Low Contrast + Highlight Shadows (Extreme)?
Thanks! -
Nostalgic mode ; it's the same snapshot (his wife is actually a living/moving person! :p ). Only the Post Processing change between all pics...
Really like the original through! Will test nostalgic+incam NR... =) -
-
@stonebat Personally I like the original shot contrast(y) like it is. But you're right...a hair light would have allowed me to keep the blacks low. I did expect to have "some" noise in the lifted areas...but now I know I have a little room to work with when lifting the dark areas.
@jax Good job. I like Neat Video for noise removal myself. -
Thanks Ian, great example!
Start New Topic


Howdy, Stranger!
It looks like you're new here. If you want to get involved, click one of these buttons!
Categories
- Topics List23,993
- Blog5,725
- General and News1,354
- Hacks and Patches1,153
- ↳ Top Settings33
- ↳ Beginners256
- ↳ Archives402
- ↳ Hacks News and Development56
- Cameras2,368
- ↳ Panasonic995
- ↳ Canon118
- ↳ Sony156
- ↳ Nikon96
- ↳ Pentax and Samsung70
- ↳ Olympus and Fujifilm102
- ↳ Compacts and Camcorders300
- ↳ Smartphones for video97
- ↳ Pro Video Cameras191
- ↳ BlackMagic and other raw cameras116
- Skill1,960
- ↳ Business and distribution66
- ↳ Preparation, scripts and legal38
- ↳ Art149
- ↳ Import, Convert, Exporting291
- ↳ Editors191
- ↳ Effects and stunts115
- ↳ Color grading197
- ↳ Sound and Music280
- ↳ Lighting96
- ↳ Software and storage tips266
- Gear5,420
- ↳ Filters, Adapters, Matte boxes344
- ↳ Lenses1,582
- ↳ Follow focus and gears93
- ↳ Sound499
- ↳ Lighting gear314
- ↳ Camera movement230
- ↳ Gimbals and copters302
- ↳ Rigs and related stuff273
- ↳ Power solutions83
- ↳ Monitors and viewfinders340
- ↳ Tripods and fluid heads139
- ↳ Storage286
- ↳ Computers and studio gear560
- ↳ VR and 3D248
- Showcase1,859
- Marketplace2,834
- Offtopic1,320


